
ePattern Video Tutorials: PRE-2023
This tutorial was written in 2006 and updated in 2017 for my original ePattern format, which has since CHANGED. If you are still working from the old (not pre-tiled) format, please drop me a line for updated pattern sheets.

Hi, folks! Since shooting these videos way back in 2006, Adobe has changed the way Reader prints into tiles for piecing together (and I've changed the way I format ePatterns). It's much easier now, but the basic steps shown in my videos below are almost identical. When you download an ePattern, you'll get a PDF titled "ePattern Instructions" that you need to read first, as it contains Adobe's steps for printing to tiles (and you'll need a free copy of Adobe Reader 11 or later). There's one additional step you'll need to get things rolling, and that's to click the "Poster" button I've circled in the screenshot below:
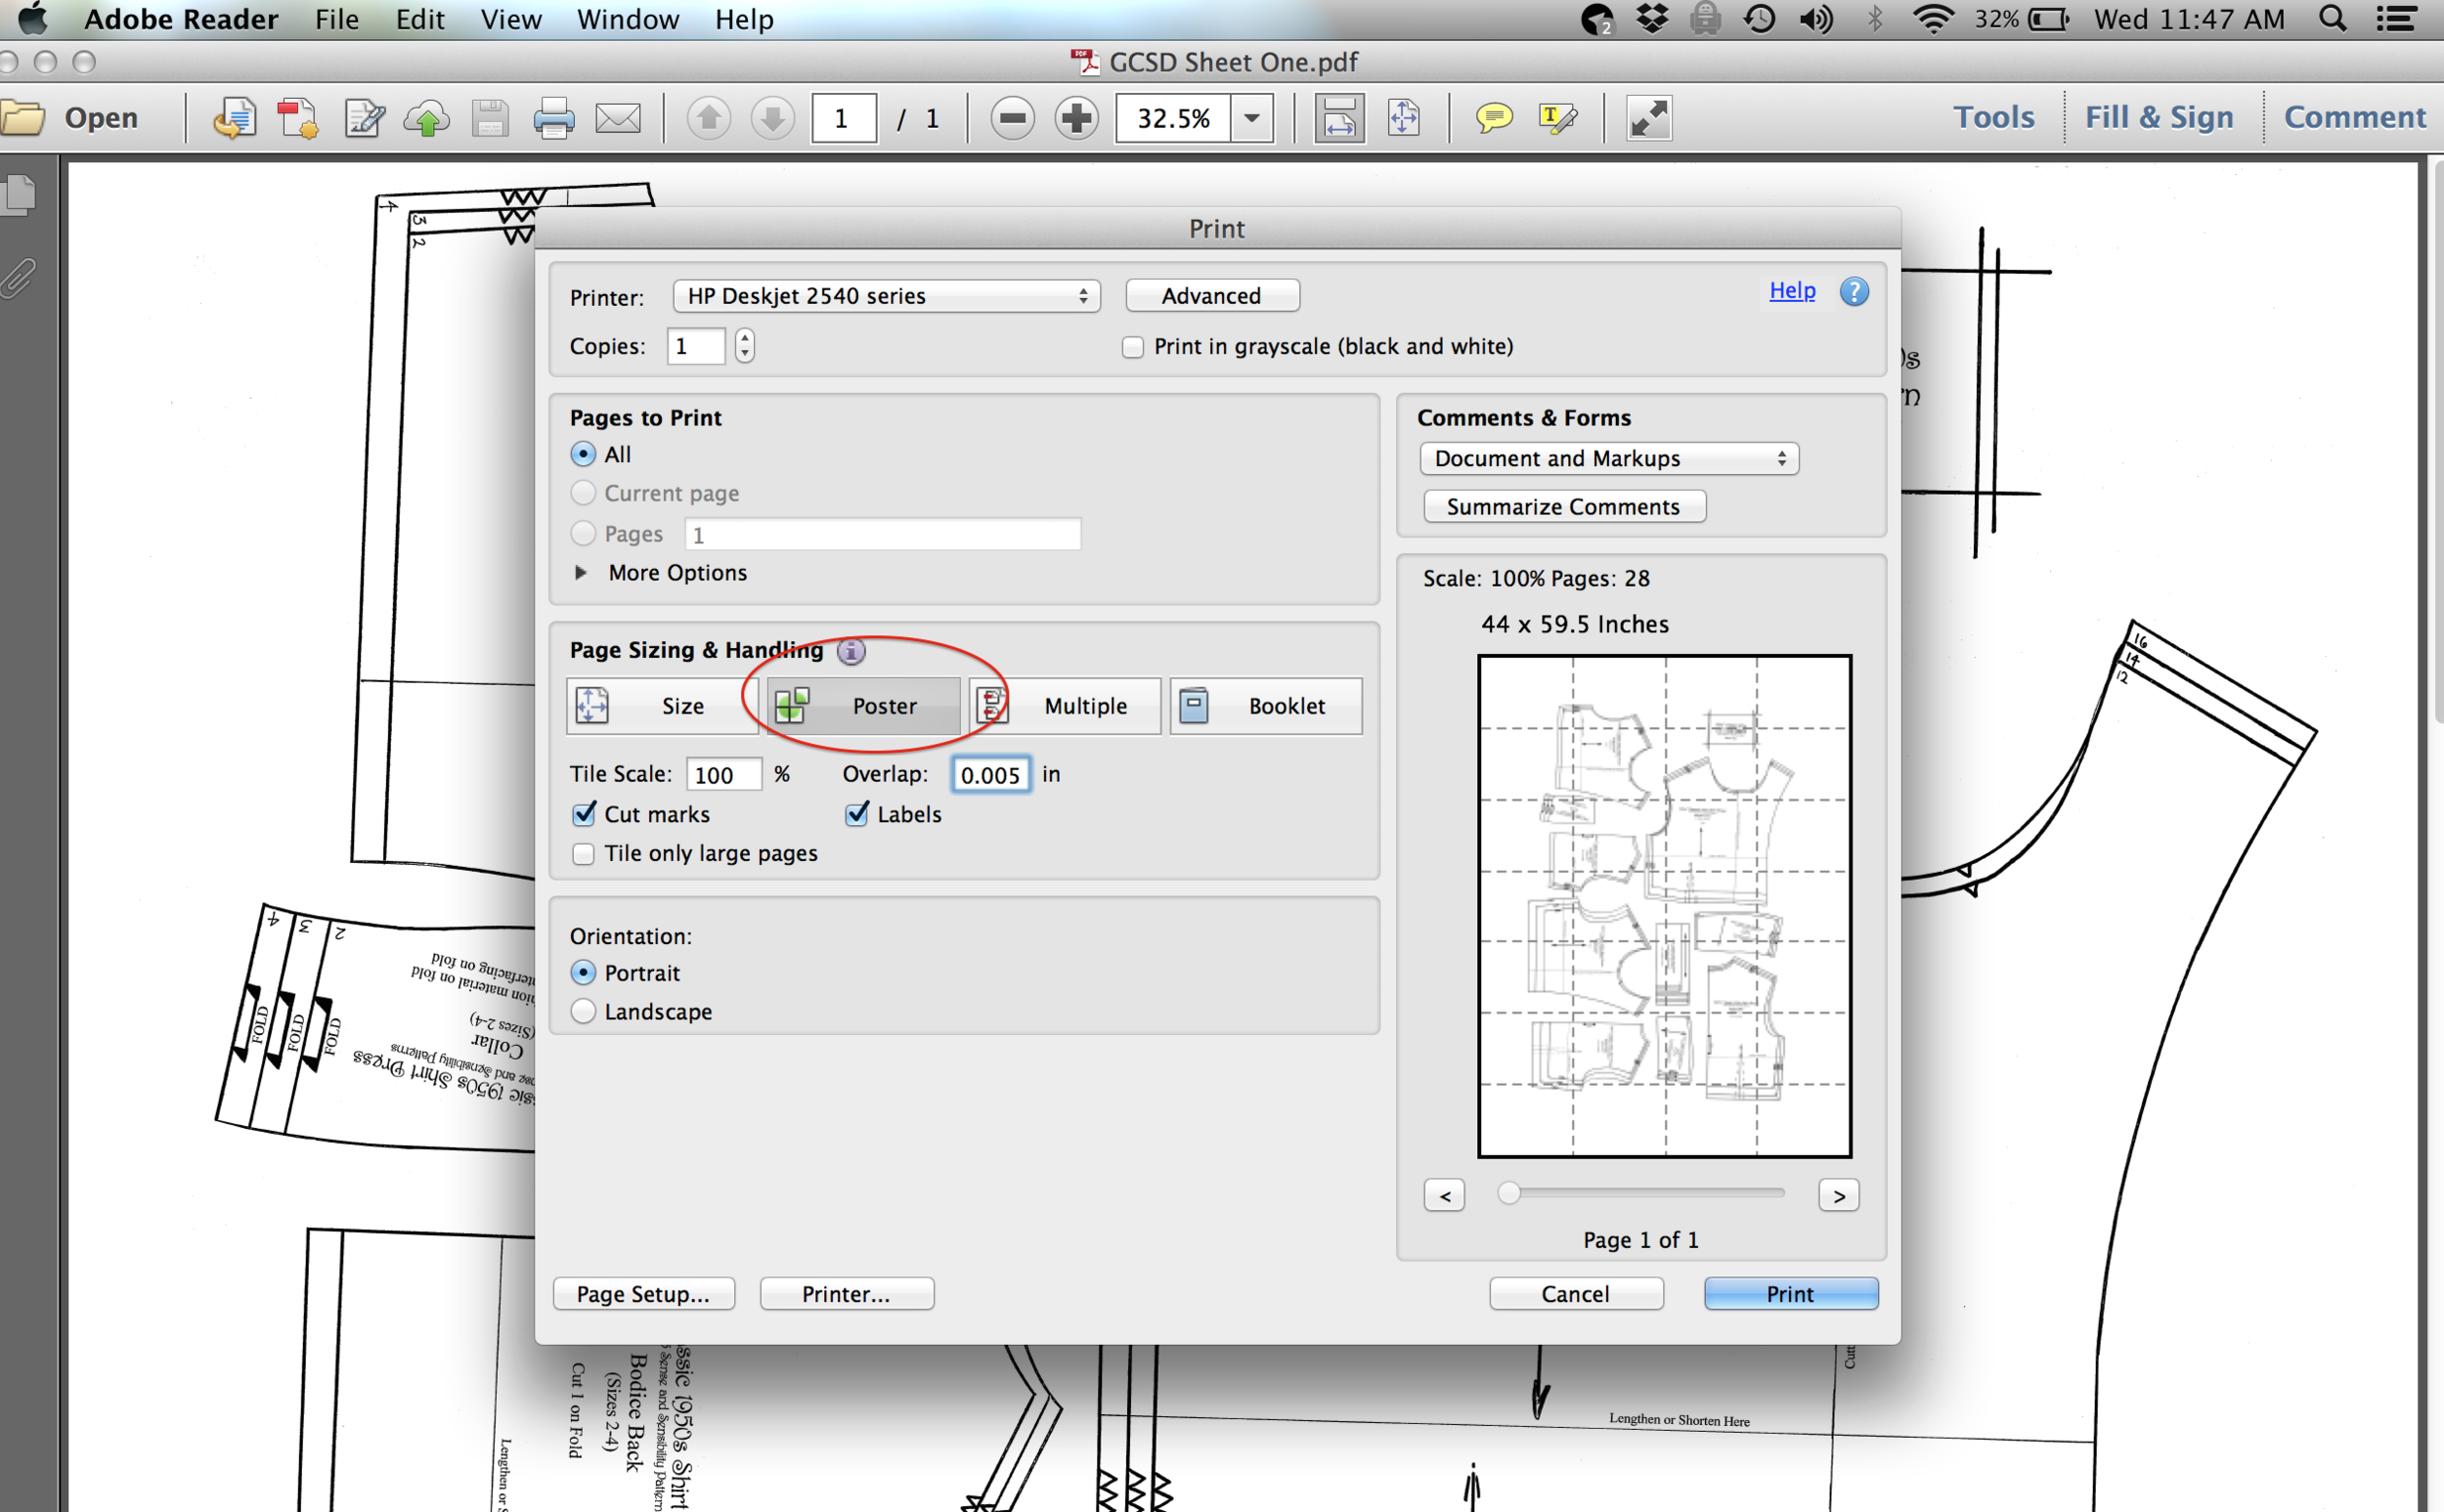
How to choose Poster Print in Adobe Reader
When you do that, your print dialogue box will immediately show the full pattern sheet broken into tiles and will give you the option for cut marks (crop lines at the corners) and labels (a little tag in the corner of each sheet so you know what order they go in).
Please note that not all printers are alike! Some will be able to print much closer to the edge of the paper than others. You will need to make sure your overlap (margin) for each tile is the same size or larger than the “unprintable” area on your specific printer. Some printers will warn you that you are trying to print in an area outside the printer’s own margins; others will not tell you! Test print a few tiles by inserting only a few pieces of paper into your printer (sadly, Adobe has done away with the feature that allows you to choose a specific range of tiles to print). When in doubt, trust the cut marks at the corners and join up any missing lines between tiles with a ruler or French curve.
Important: if you are printing on A4 paper (as I did in South Africa), your tiles will be narrower (A4 paper is 8.26 inches wide instead of 8.5). You'll also have slightly longer tiles (A4 is 11.69 inches long instead of 11). This doesn't mean your ePattern won't work, but it does mean you have to double-check those printable areas on your printer and your overlap. Depending on how close to the margins your printer can lay down ink, you may lose part or all of the cut marks on the sides. You'll also have extra blank space at the bottom of each tile.
Just use your cut/crop lines at top and bottom and ignore the blank space. For the sides, you'll need to take a good look at what's on the adjoining tile(s) and carefully match. This is why, ultimately, eyeballing as you lay out tiles is something you've got to do. I've found this with all ePatterns I've ever used, and it's why I never start taping tiles together until I've laid all the tiles out and puzzled them together. It takes a bit of work, but you'll get it in no time! [If you have my pre-2013 ePatterns with the pre-set tiles, feel free to drop a line and request updated PDFs. I'm happy to provide those if you want to switch. I can look up your older orders and send replacements.]
So, without further, ado, here are my original video tutorials, which will help you as you piece your tiles together to form the full-sized pattern sheets. Happy sewing!
First: How to Print Your ePattern:
Next: How to Lay Out Your ePattern:
Finally, How to Finish Your ePattern Sheet: