Let's Make Colonial Costumes for Girls!
Out of all the patterns I've designed in the past 18 years, the Girls' 1780s Portrait Dress pattern is, hands down, my own daughters' very favorite. I've made them so many dress-up dresses from this pattern in toiles and stripes and prints, and they want new ones as soon as they outgrow them! But this year, both girls asked if I could make dresses that looked more like something "Felicity" (the now retired--sigh--American Girl doll) would wear.
What they meant was that they'd like dresses that looked a little less 1780 and more 1775--including a stomacher, open skirt front, and petticoat beneath. Knowing they'd be using these for imaginative play and not for serious reenacting, I decided it would be simple to make a few easy changes to achieve the look without working up an entirely new pattern. I took both girls shopping to choose fabrics and trims, then photographed each step so I could create this tutorial for you, too!
First, the yardage requirement for the dress remains the same, but you are going to purchase a contrasting or complementary fabric for the "petticoat" beneath, plus a yard of 1/4" to 1/2" ribbon. You'll need one length of the petticoat material (a "length" is the measurement from your child's waist to the desired hem length, plus two inches to allow for waistline seam and hem). Here are the materials my daughters chose:
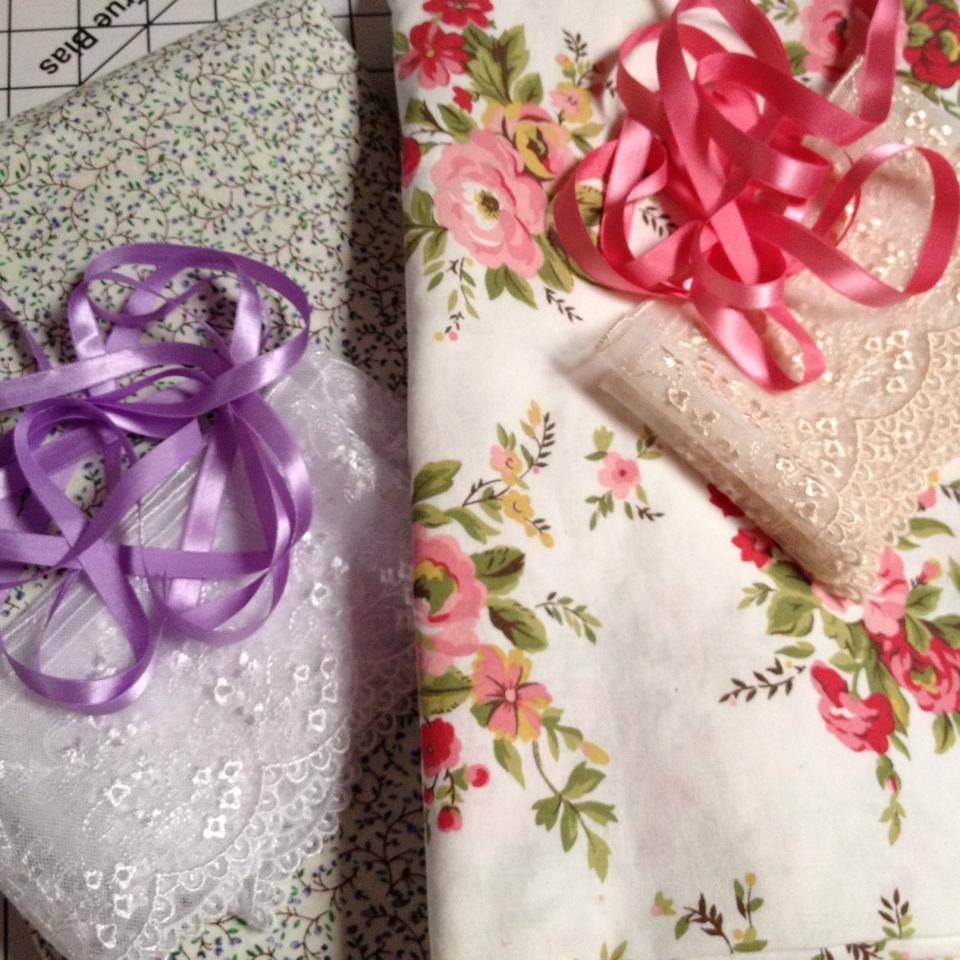
Many thanks to Katrina at Edelweiss Patterns for the gift of the lace for elbow ruffles!
Not shown are the contrasting materials for the "petticoats" that would show at the center front skirt opening, but you'll get to see those as we go along. Now let's get sewing!First, you'll cut out the dresses exactly as shown in the pattern instructions, but when everything is ready to sew, you'll cut the skirt front up the center (along the fold line). The extra length of material you've purchased to use as the "petticoat" should be the same length as the skirt front and back. Set aside all pieces except the bodice front at this point, because you are going to create the look of a stomacher with ribbon (and, optionally, contrasting fabric).
Making the Bodice and "Stomacher"
Below is the bodice front for my oldest daughter's dress. It had such a beautiful floral motif that she didn't want to cover the center front with another material and opted for ribbons criss-crossing between two lines of lace instead:
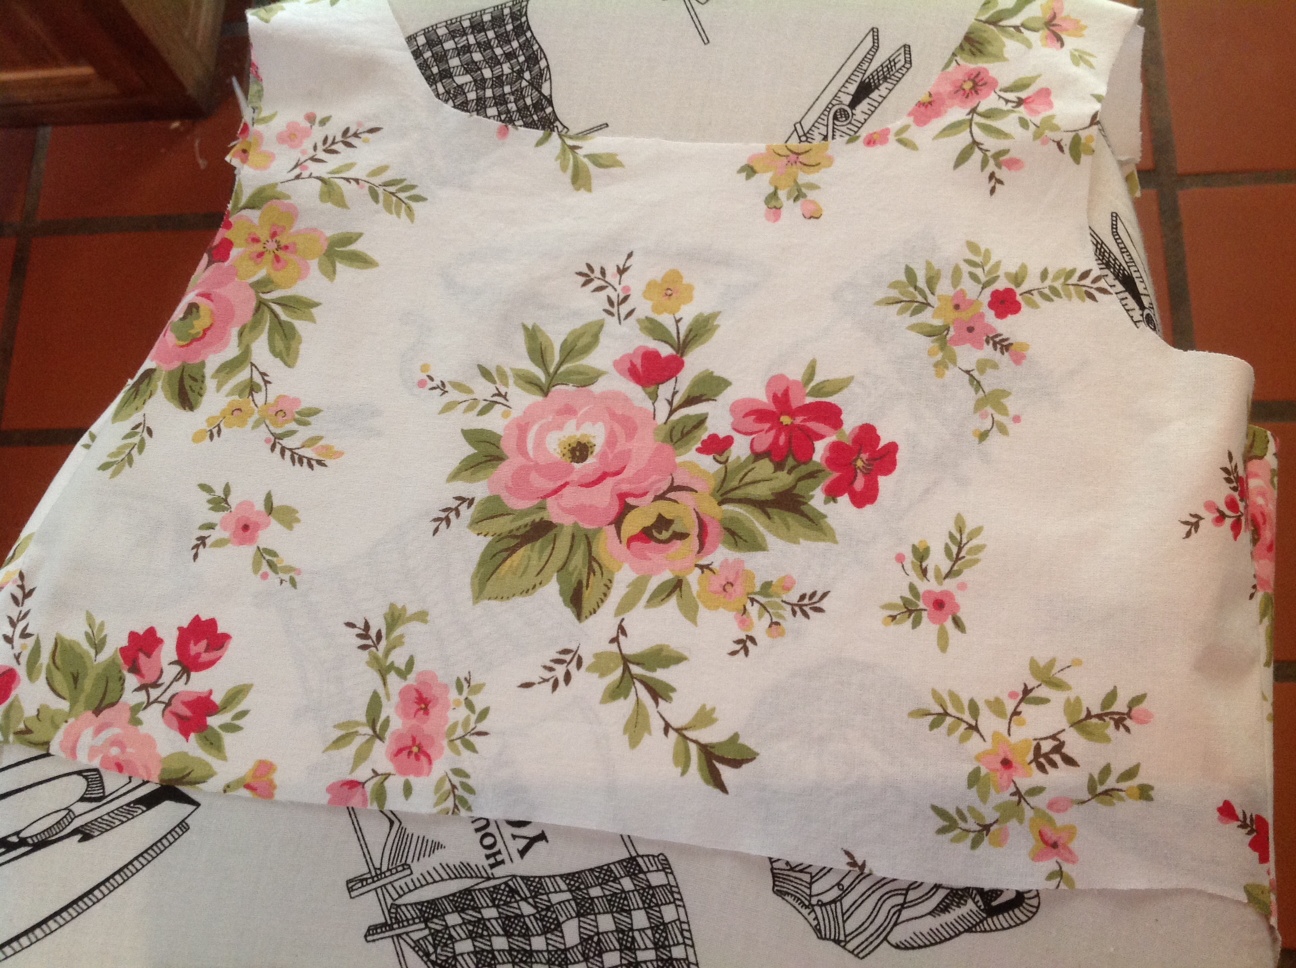
Bodice front
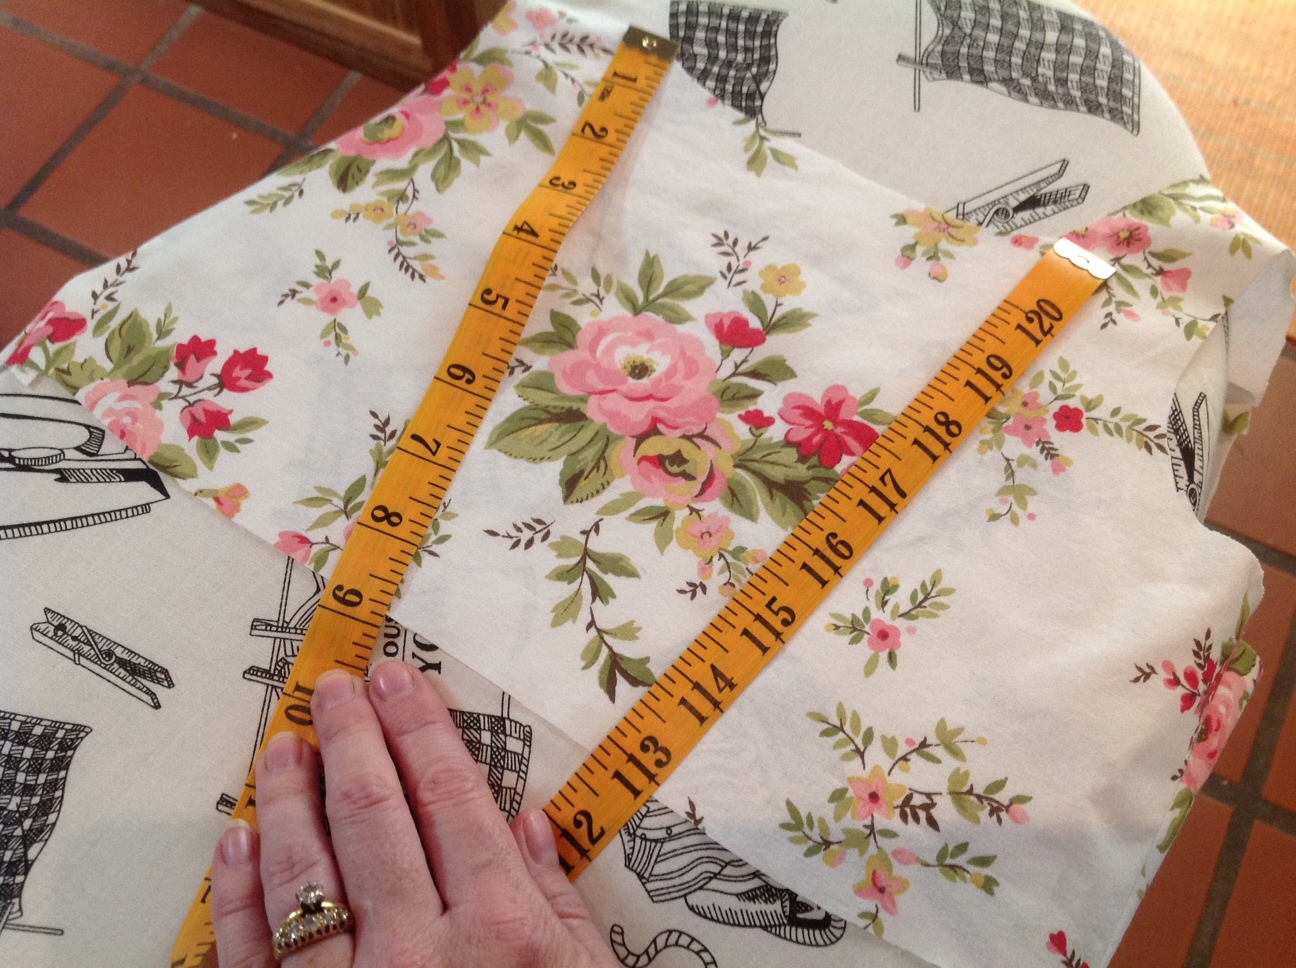
After marking the center front of the bodice, lay it flat and use your measuring tape to mark off the "stomacher"--you're basically just eyeballing it:
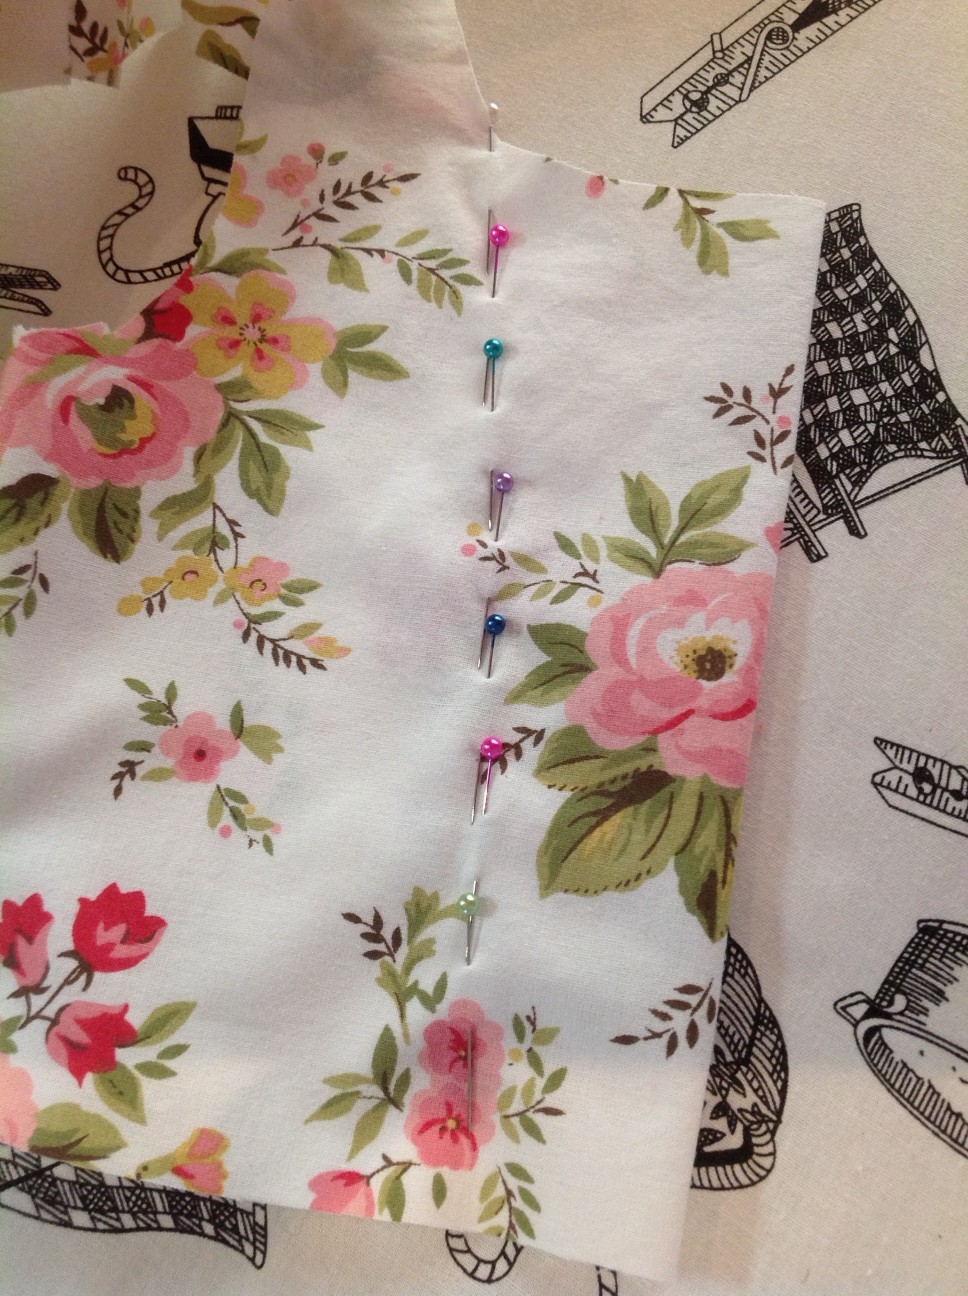
Now mark these two lines with pins:Because you've eyeballed this, you need to fold it in half to make the pin marks even on both sides. Just fold it and double-check the marks, moving pins as needed for a symmetrical "stomacher" area:

Pins marking stomacher
Making sure your pins aren't too close to any stitching lines, go ahead and make up the bodice with its lining, clip curves, turn and press. You're going to sew the bodice embellishment through the bodice and its lining to provide maximum stability.
Checking the pins
Now you are ready to create that beautiful "stomacher" with 1/4" to 1/2" ribbon and lace. First, mark the top center of the bodice front and drop down a quarter of an inch. Fold the ribbon in half longways and mark its middle, then lay it out on the bodice front:
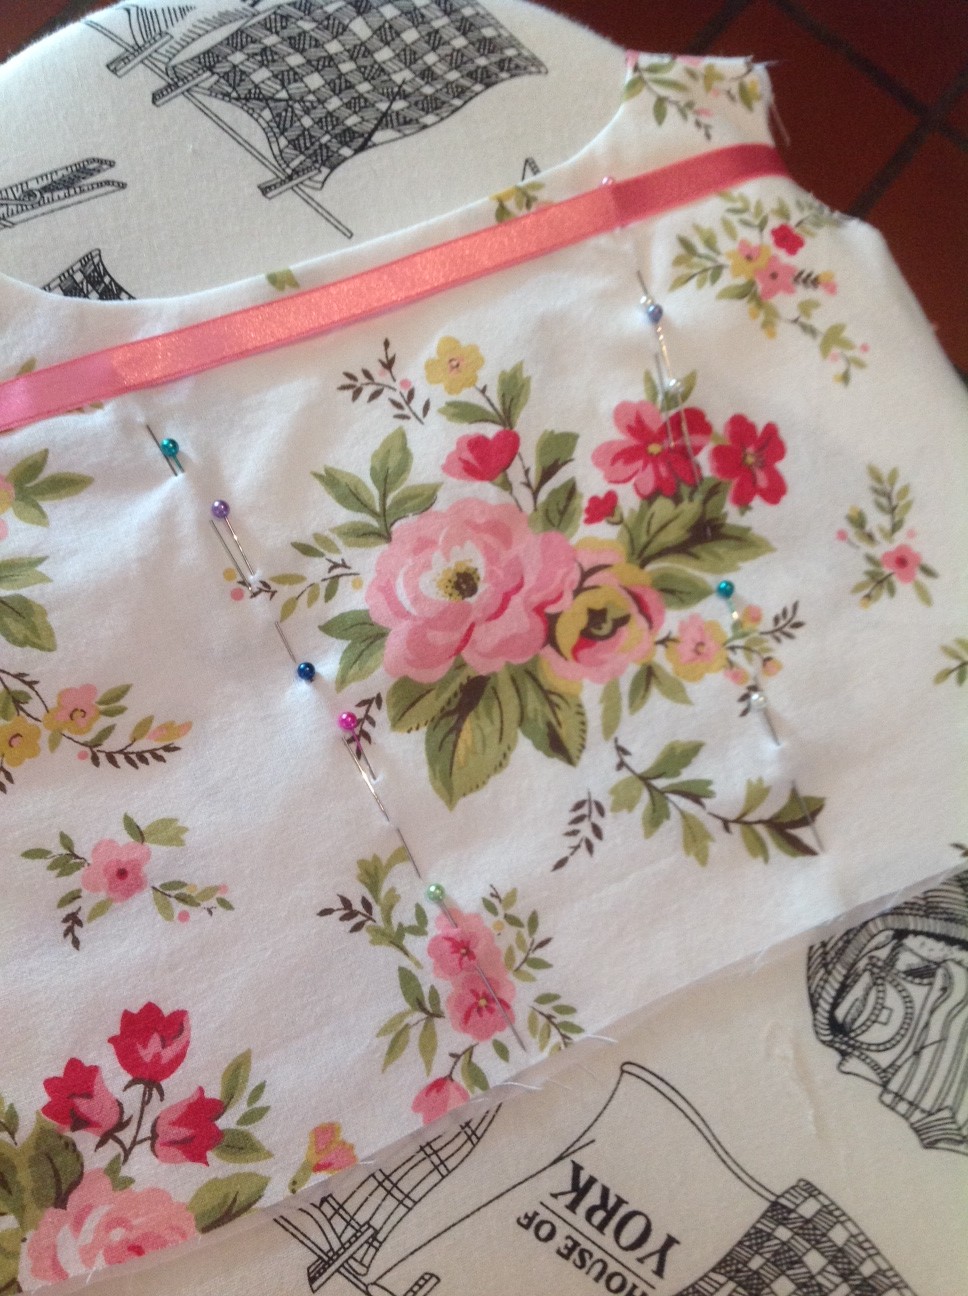
Laying on the ribbon.
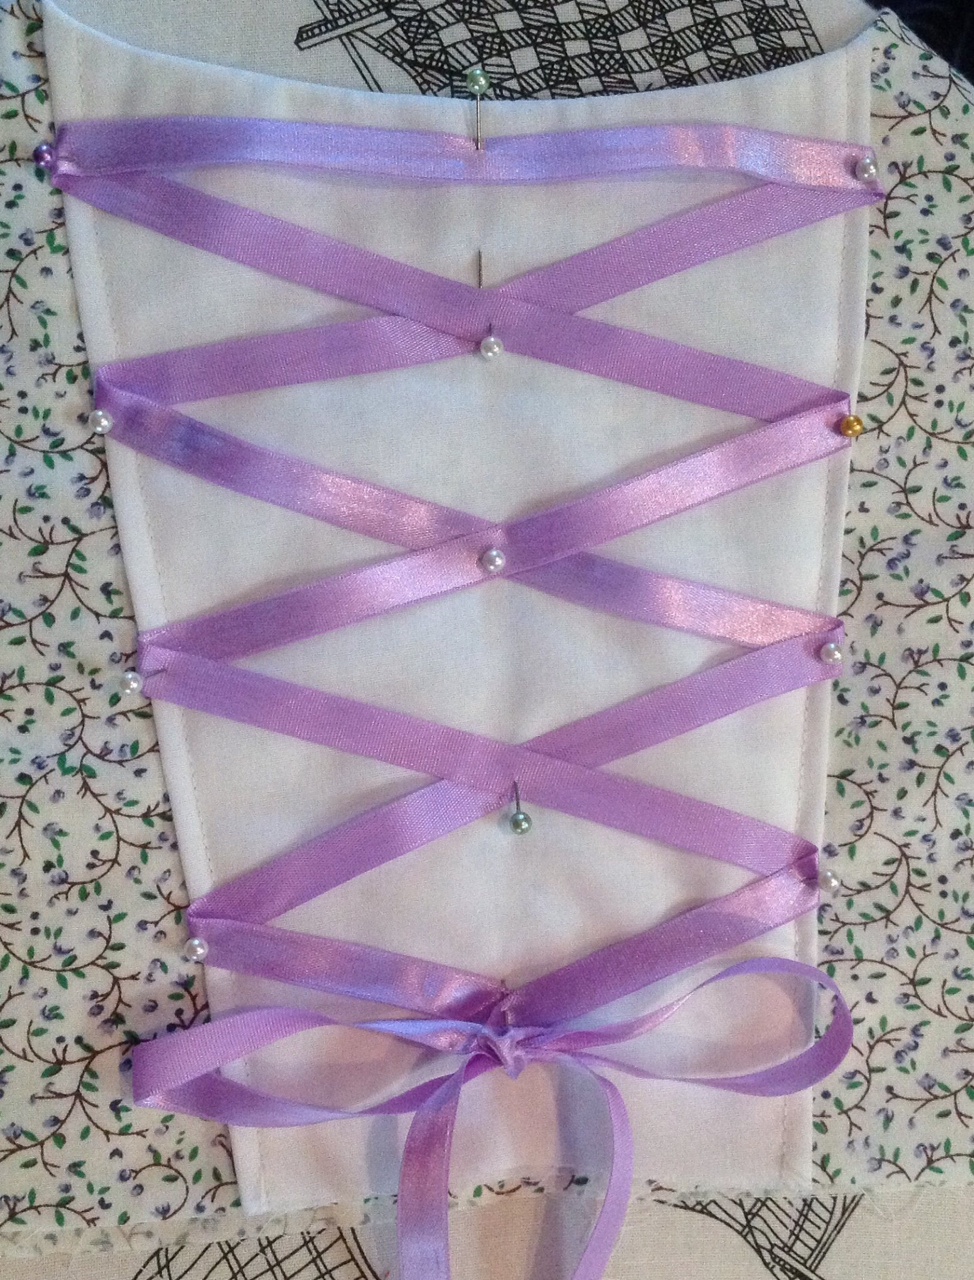
Pin this starting bit of ribbon in place, then cross the ribbon over to the opposite side, like shoelaces or corset lacing, eyeballing the spacing as you go (you'll probably have to adjust it a couple of times -- and remember to leave an inch at the bottom free to allow for the skirt/waistline seam). Pin each end of the "x" as you go:
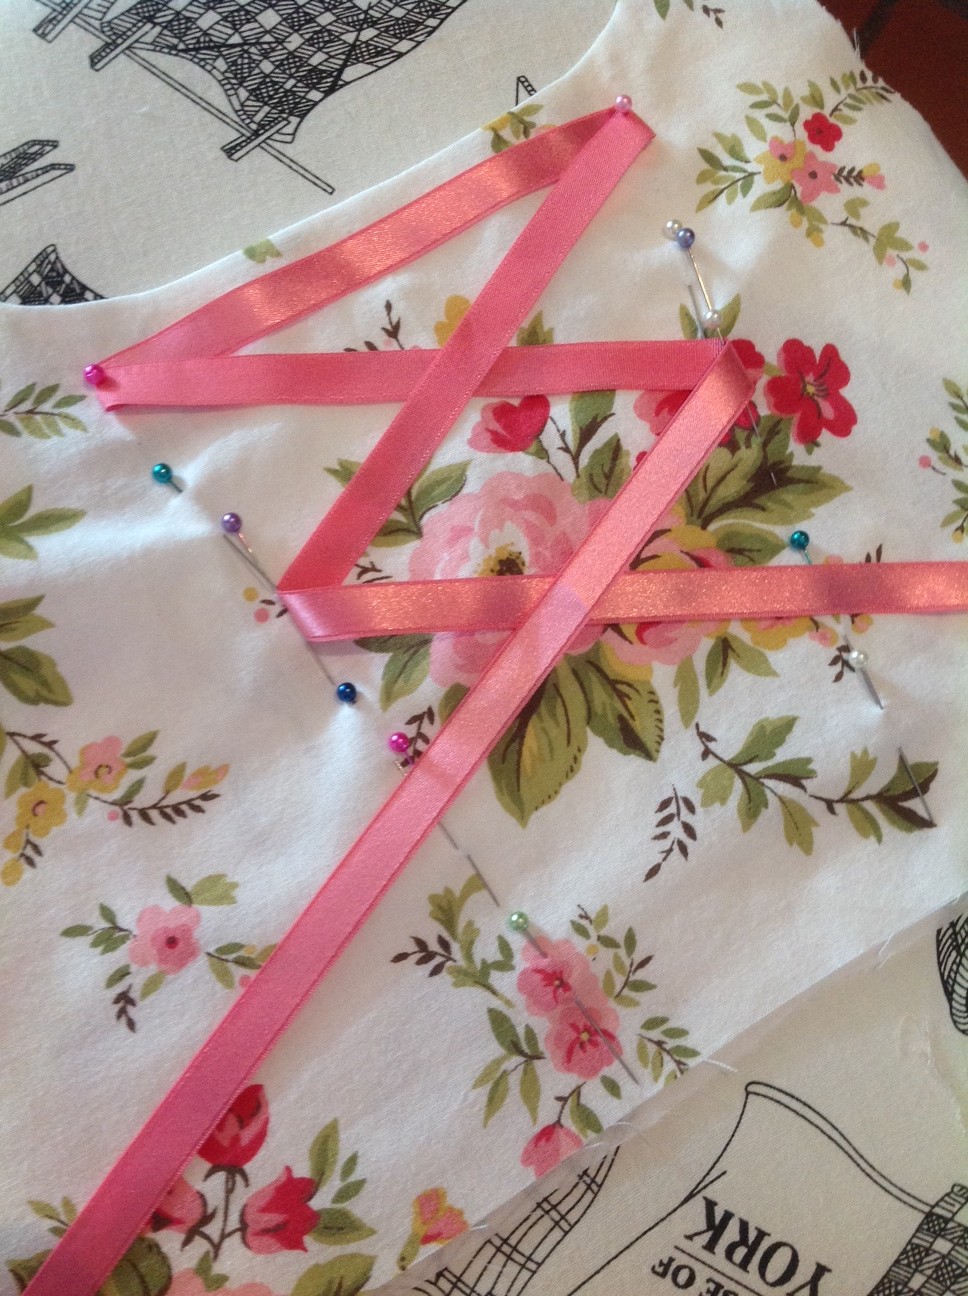
Crossing the ribbon
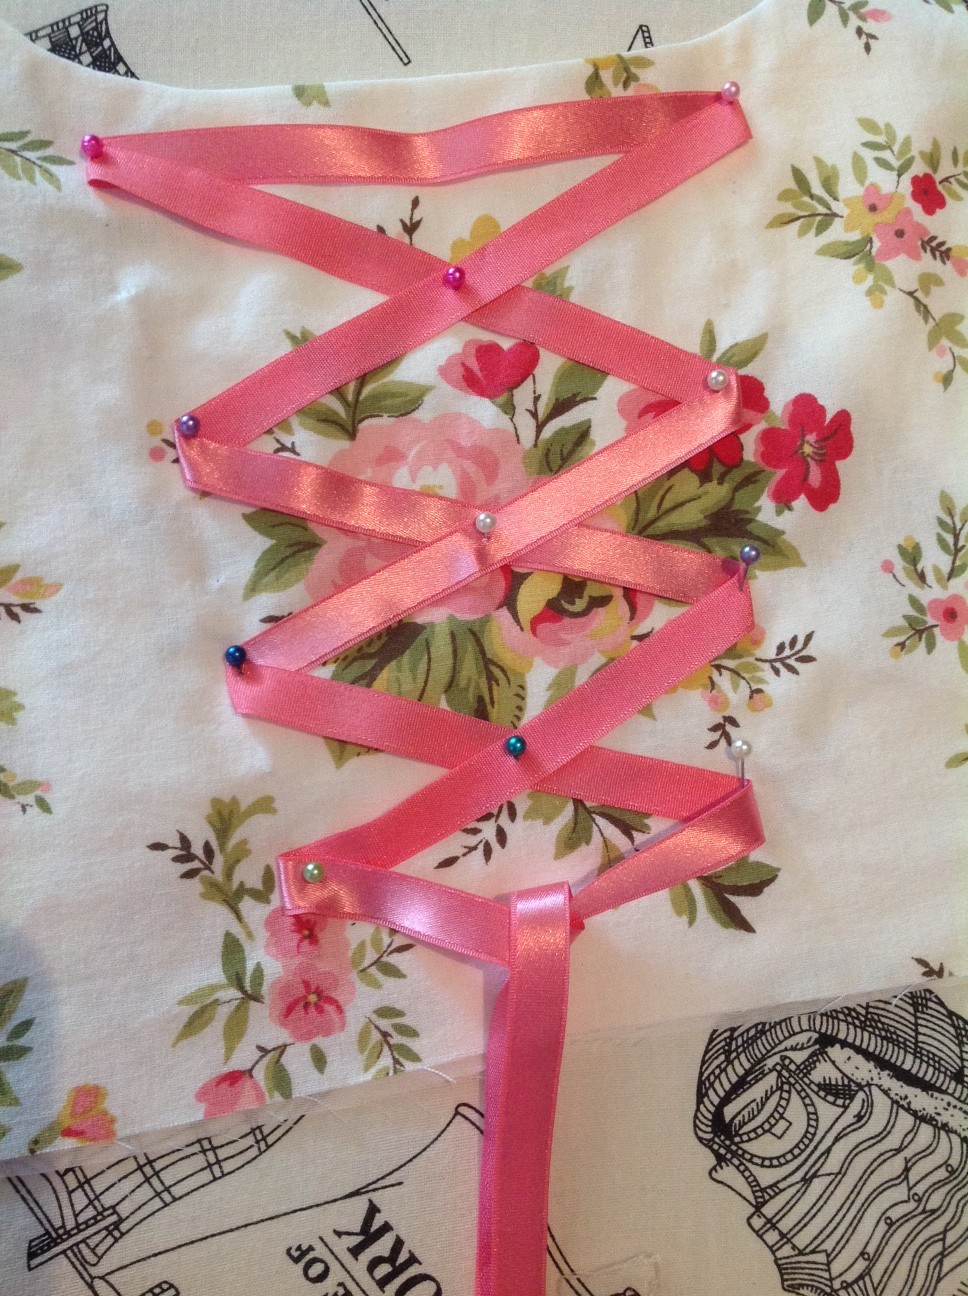
Ribbon crossed
You'll have enough ribbon left over to tie into a pretty bow at the bottom. be sure to pin this up out of the way when you stitch so it doesn't get caught in any seams.
To secure the ribbon "lacing" in place and hide the fact that it's fake, you can run two lines of lace down either side, which also helps to create the illusion of a stomacher:
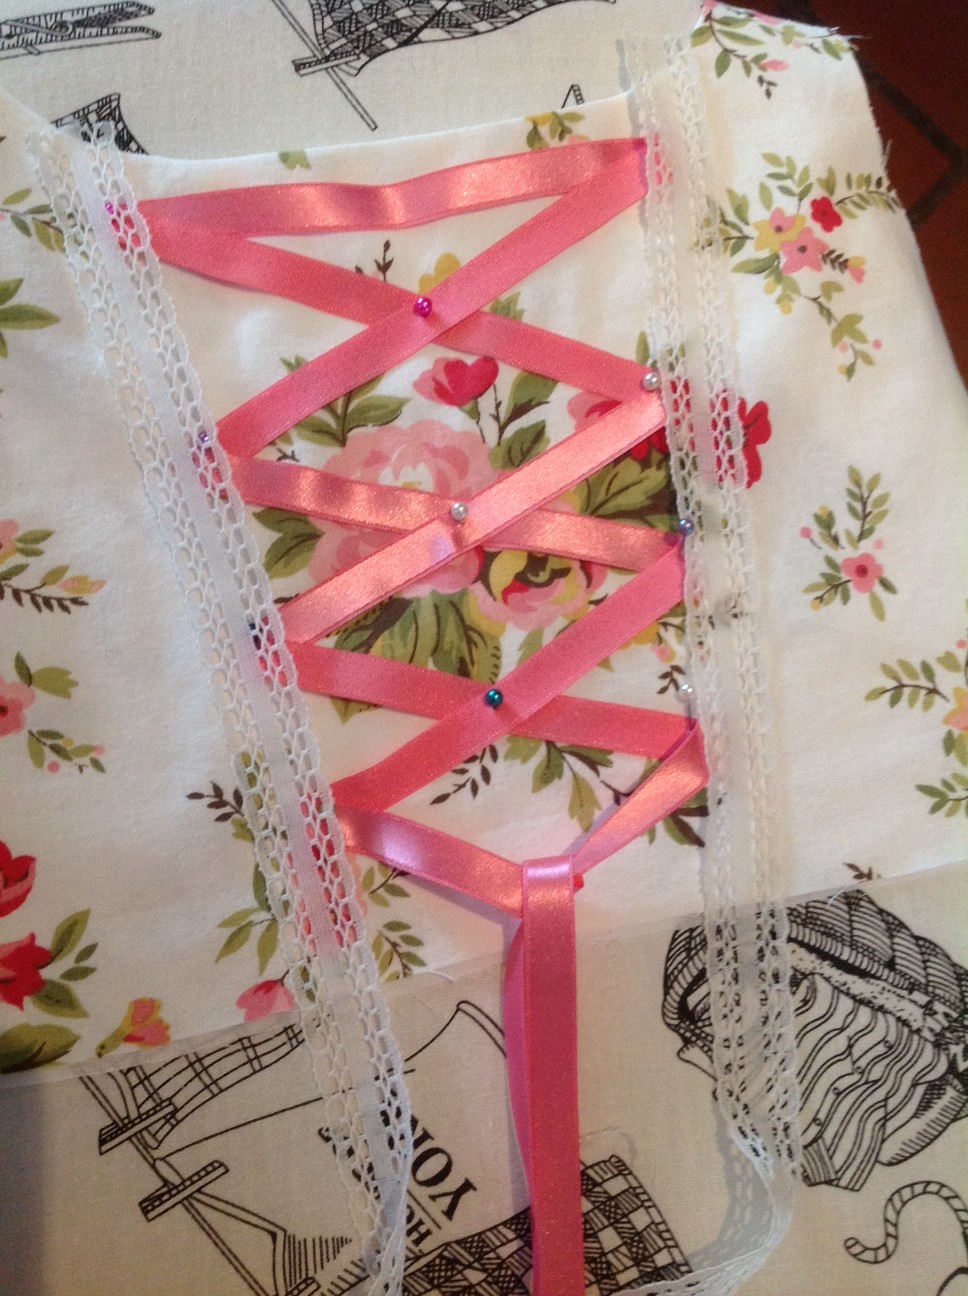
Ribbon in place
Lace cut and pinned in place.
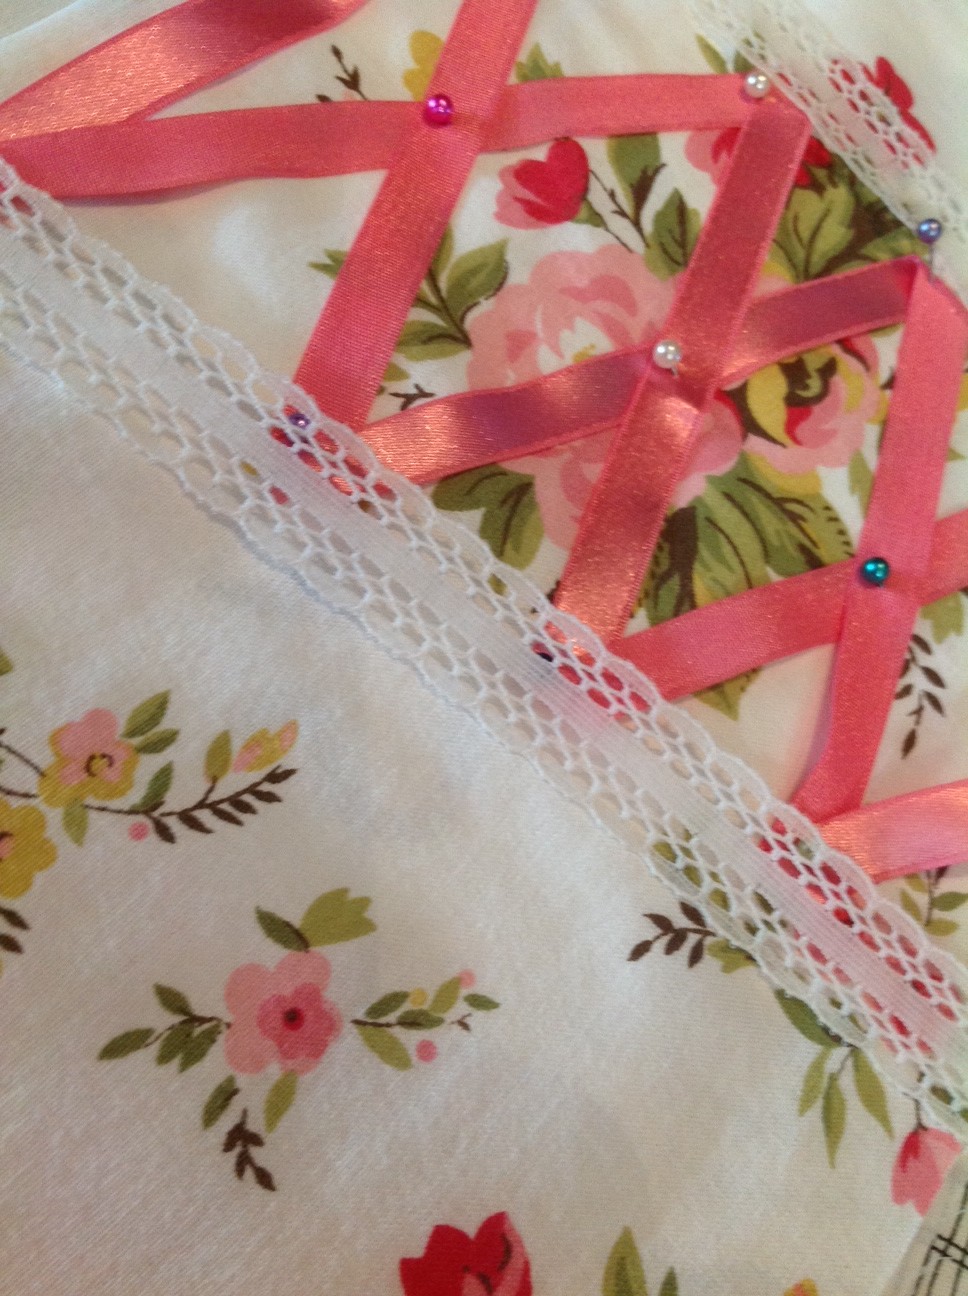
After cutting and pinning the lace in place, you'll stitch down the edges of the lace, catching the ribbon in place at the same time. (You're sewing through into the lining beneath, so make sure that is smooth and doesn't bunch as you go.)
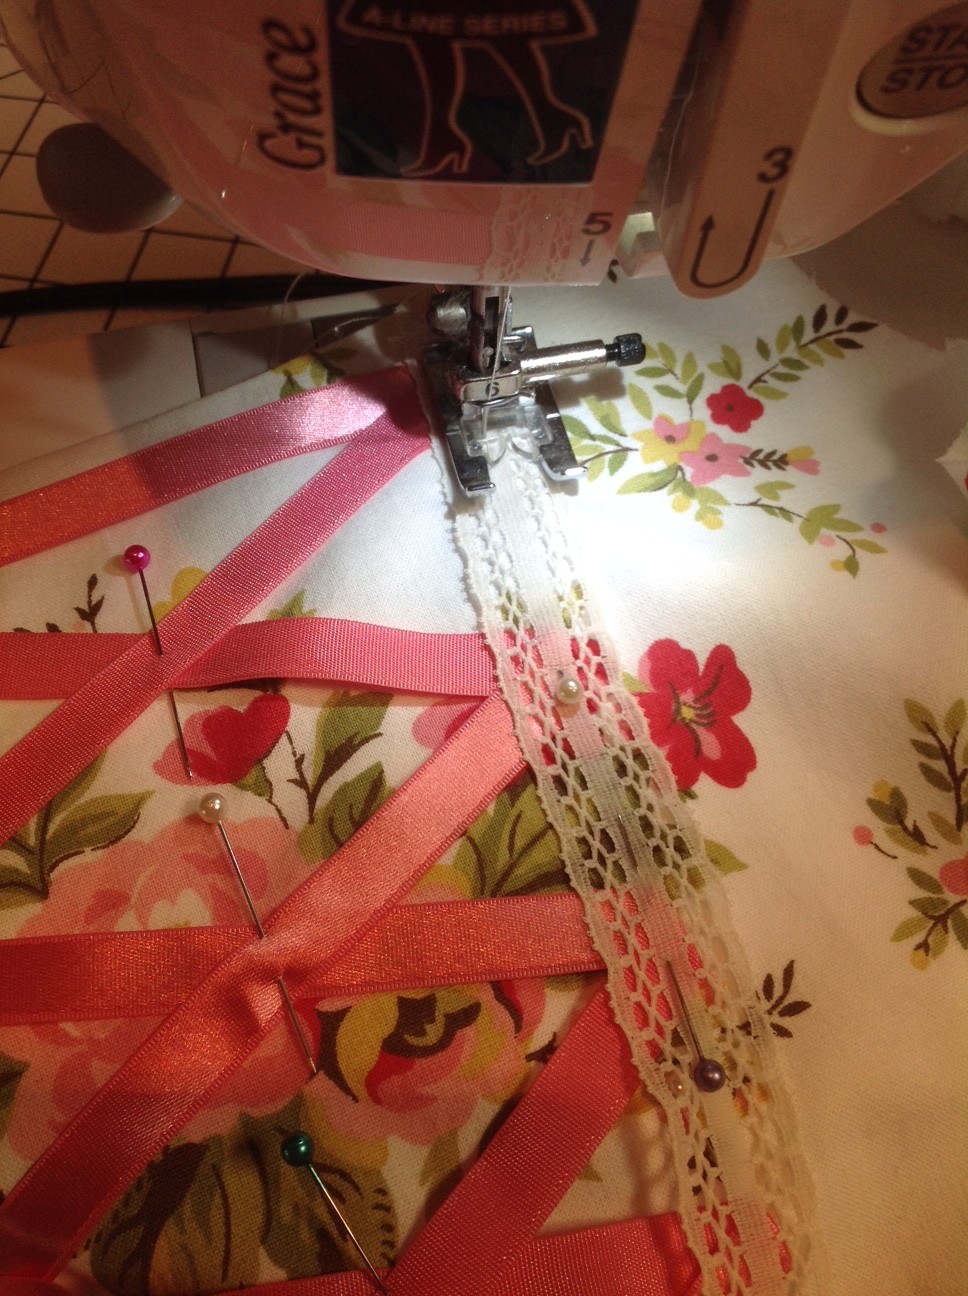
Sewing the first line of stitching down the inside of the lace. Repeat down the outside edge.
Once this is neatly sewn in place, you can hand tack the center of each ribbon "x' with matching thread to hold it in place. Now secure the ends of the ribbon (I folded them neatly and pinned them to the center front of the bodice). Set the bodice aside and stitch together the sleeves, following the instructions exactly and being sure you fit the sleeve to the child, using my video tutorial to rotate and place the sleeve correctly.
Sleeve finished and trim, ready to be set.
Optional Fabric Stomacher
If you're using a smaller print material or want the look of a contrasting stomacher in the center of the bodice, you can simply cut one out of another fabric, using the pin-marked bodice as your pattern piece. Here is my second daughter's bodice with a white "stomacher" piece:
Fabric stomacher
As you can see, I cut the white piece, then hemmed the sides. Because I planned to use a ruched, pinked self-fabric trim down the bodice and skirt edges, I didn't mind machine-stitching this piece in place. Then I sewed the bodice together, pinned the ribbon in place, and stitched down the sides again to catch the ends of the ribbon in place. The rest of the bodice is sewn together as usual.
Skirt and "Petticoat" Construction
The fake petticoat is meant only for looks. It will not be sewn up separately and will not go all the way around the waist. Instead, you're going to join it to the skirt back at the side seams when you sew skirt fronts and back together. There is, therefore, only a petticoat front and not a back, since the petticoat only shows at the front of the costume. So, to begin, hem the vertical edges of the skirt front to finish them off and run basting stitches for gathers at the tops of the skirt fronts and across the top of the petticoat piece. Then lay skirt front pieces over the length of petticoat material (which is actually wider than the skirt front, since you are using the entire length uncut), matching side seams, and pin the skirt sides and petticoat sides together. When you sew skirt front to skirt back (right sides together), the petticoat piece will be included in that seam:
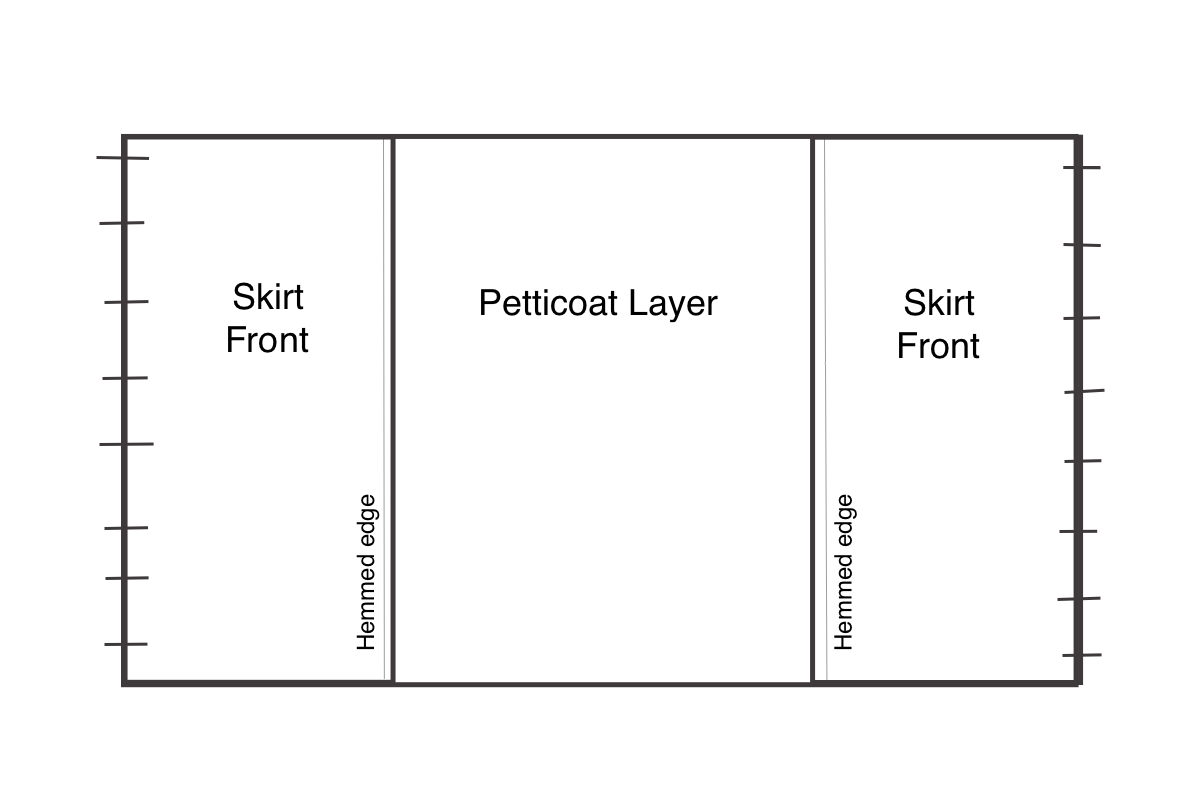
Skirt to Petticoat
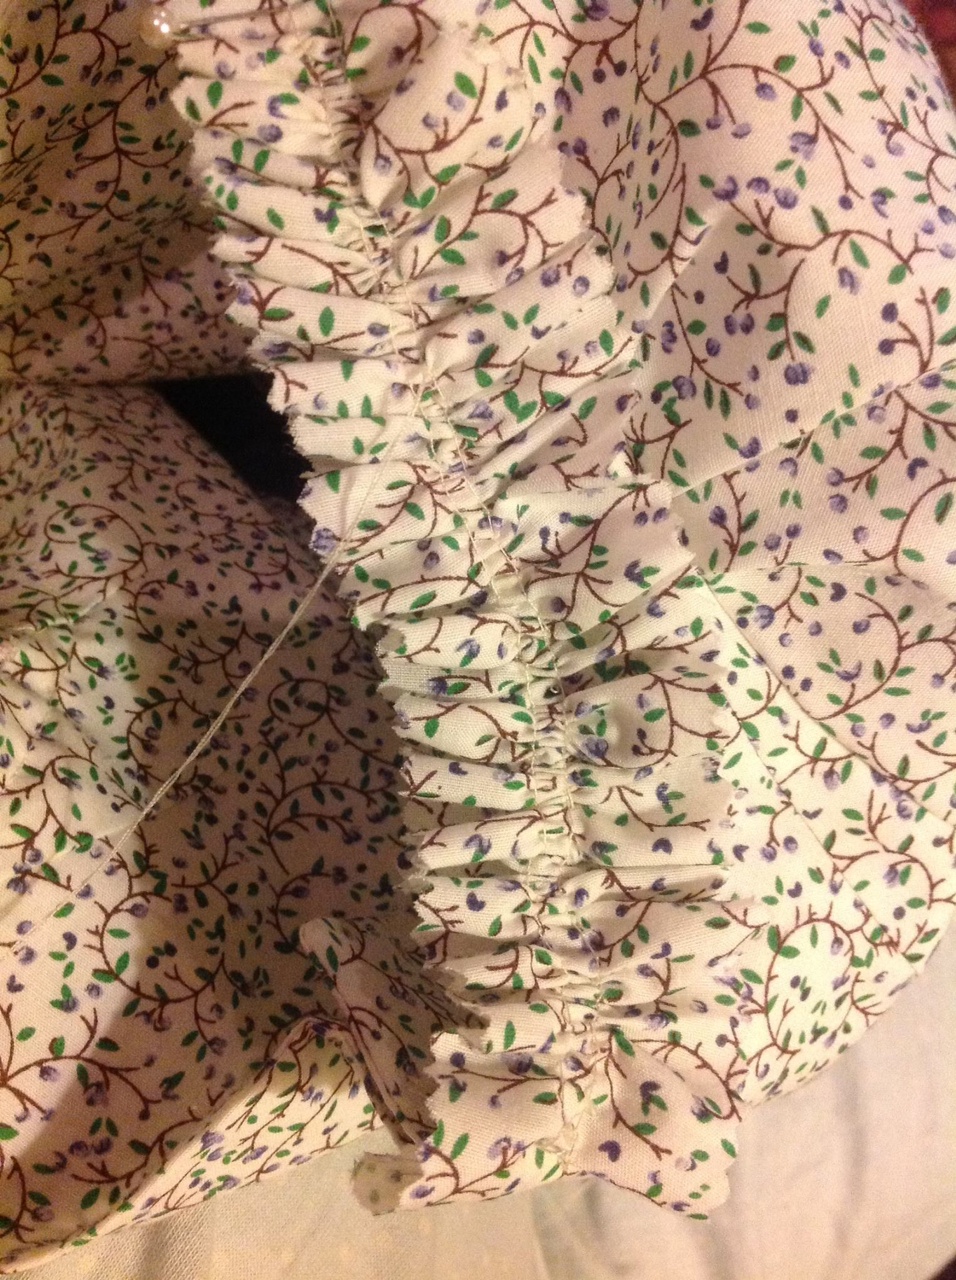
Now pin the bodice to the skirt, matching the center front of the petticoat to the center front of the bodice and matching the hemmed edges of the skirt fronts to the sides of the "stomacher" area on the bodice. This creates the split skirt front look you are aiming for. Match the side seams of the skirt to the side seams of the bodice and the skirt placket to the bodice back edges. Pull up the gathering stitches of the petticoat first, leaving the center front of the petticoat smooth (no gathers) and concentrating the gathers from the sides of the skirt fronts to the side seams. Now pull up the skirt gathers for the fronts, distributing the fullness evenly between the front edge and the side seam. Pull up skirt gathers in back, also distributing them evenly. (Optionally, you can pleat the skirt in place if you'd like to go for that look.)
Stitch skirt to bodice, keeping the bodice lining free (because you didn't stitch the ribbons all the way to the bottom of the "stomacher", you have an inch of the lining free at the lower edge). Also make sure you don't accidentally catch the bodice ribbon ends in the waistline seam. Turn dress right side out and press neatly. Turn under the lower edge of the bodice lining 5/8" and whipstitch in place to finish. Try the dress on the child and mark the skirt and petticoat hems (which are separate), then hem and iron.
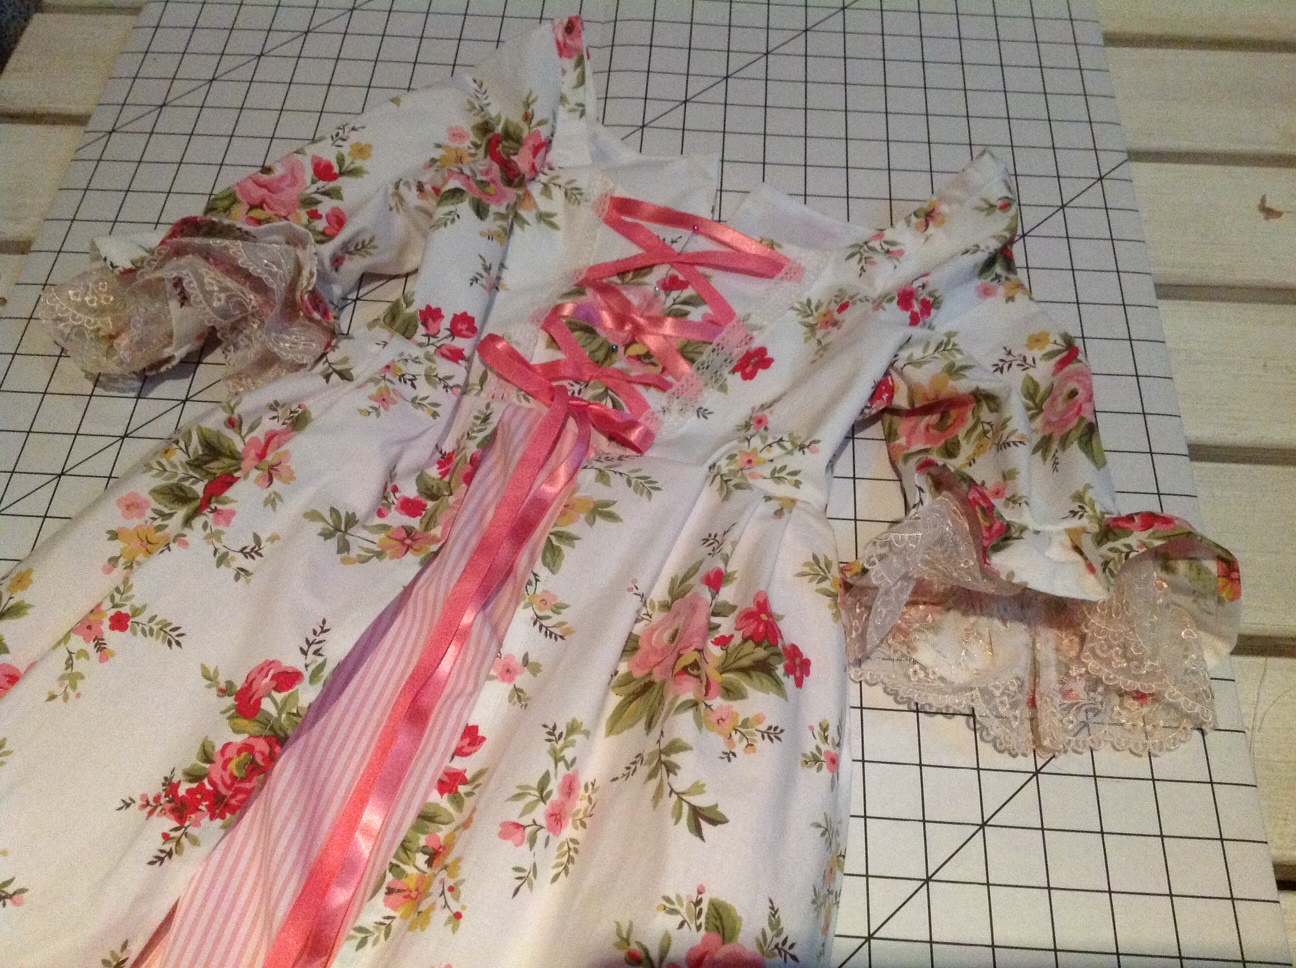
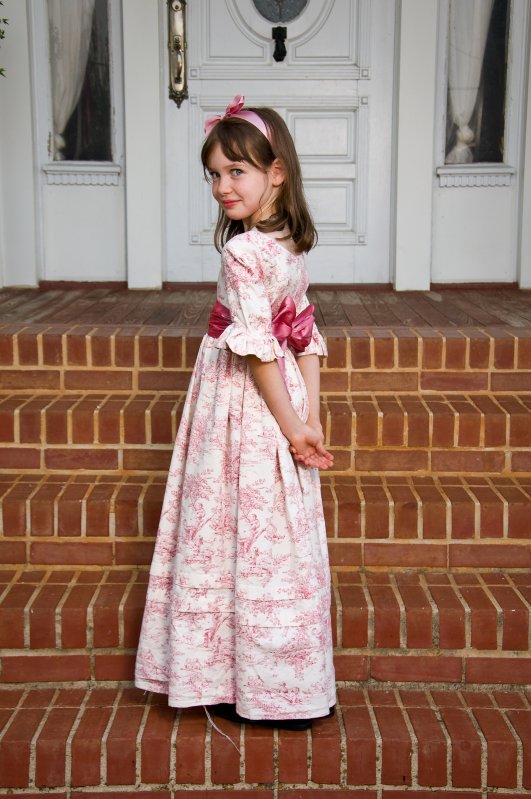
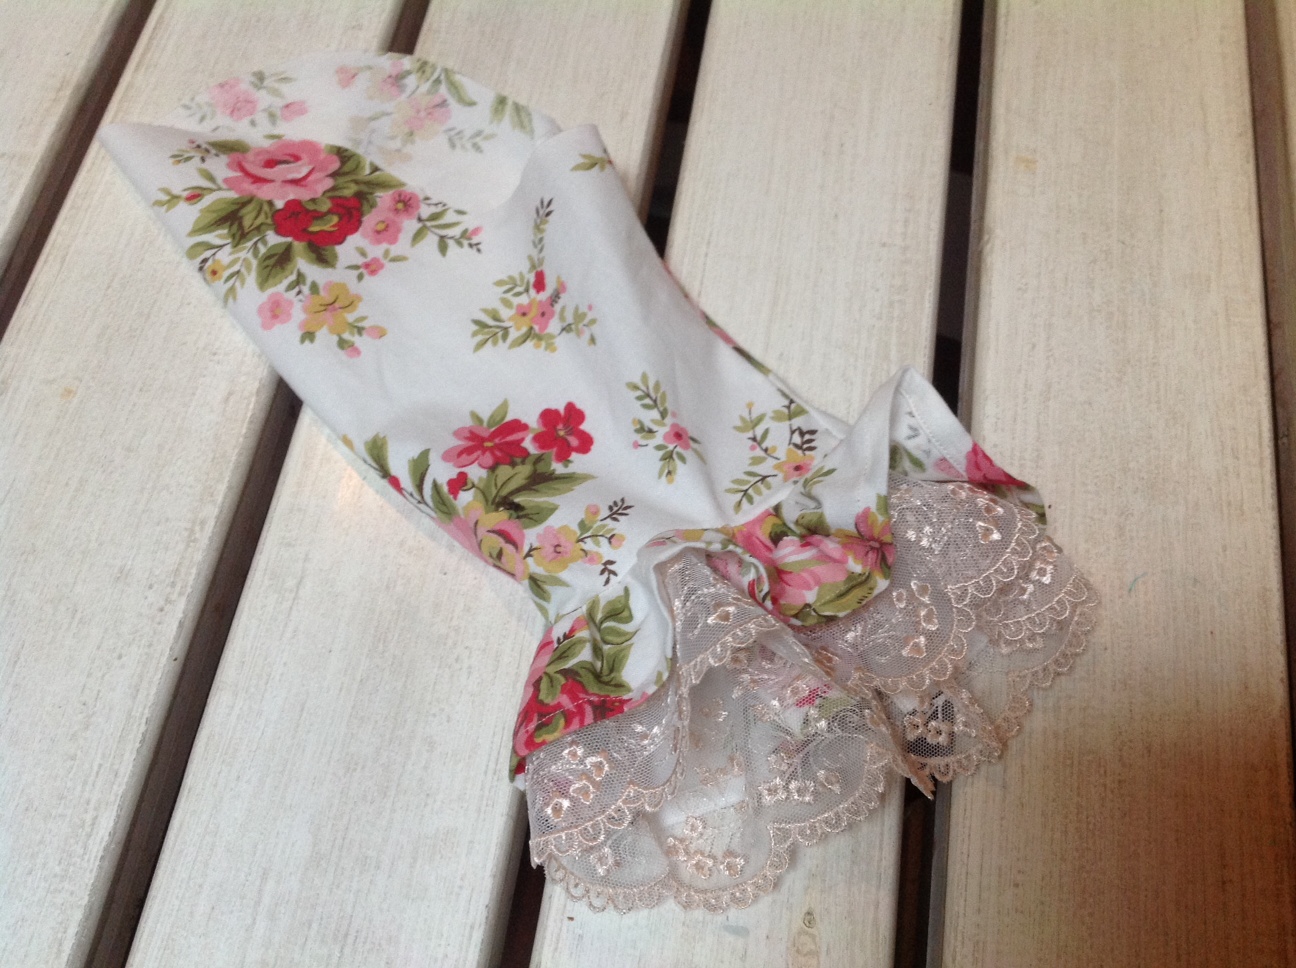
First dress finished!
For the second dress, my daughter wanted the full-on ruched self-fabric trimming of the time period, so I sat up one night ("watching" a favorite costume film) and created the pinked ruffle. This basically involved measuring the gown's front "opening" from hem up around the neckline and to the center back opening. Then I took that measurement and tripled it to get the correct length for the trim for each side of the dress. Next, I cut enough strips of the leftover fabric to sew together for the two lengths (I made my strips two inches wide). Then I pinked each edge of the sewn strips with pinking shears and ran a basting stitch down the center (breaking at the seams). Finally, I pinned each strip to the dress, matching it to the bottom of the skirt front on one side, then the waistline seam (which is basically the halfway point), then the center back. Now's where the three hours sitting on the couch came in! I pulled up the basting stitches, pinned the trim in place, and hand-stitched it to the dress:
Stitching the trim in place
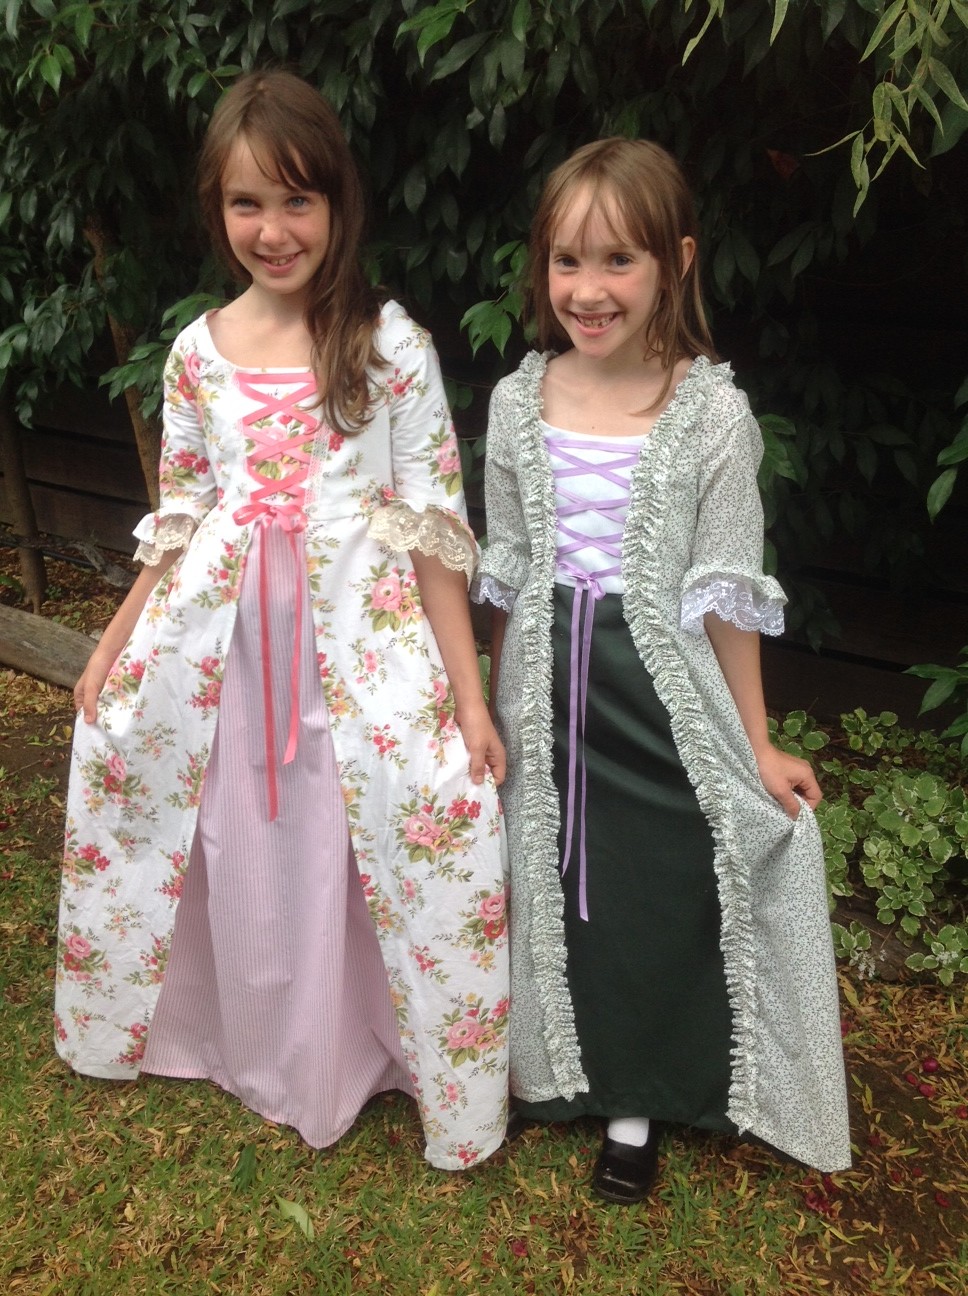
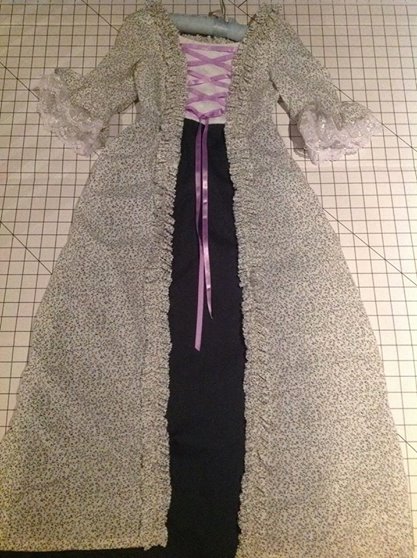
Admittedly, this is a bit over the top for a little girl's play dress, but I enjoyed the challenge -- and you can always use this tutorial for a more serious adult version! Here's the second dress all finished:
My girlies were absolutely thrilled with their dresses and promptly donned them for a few photos:

Girls' Colonial Dresses
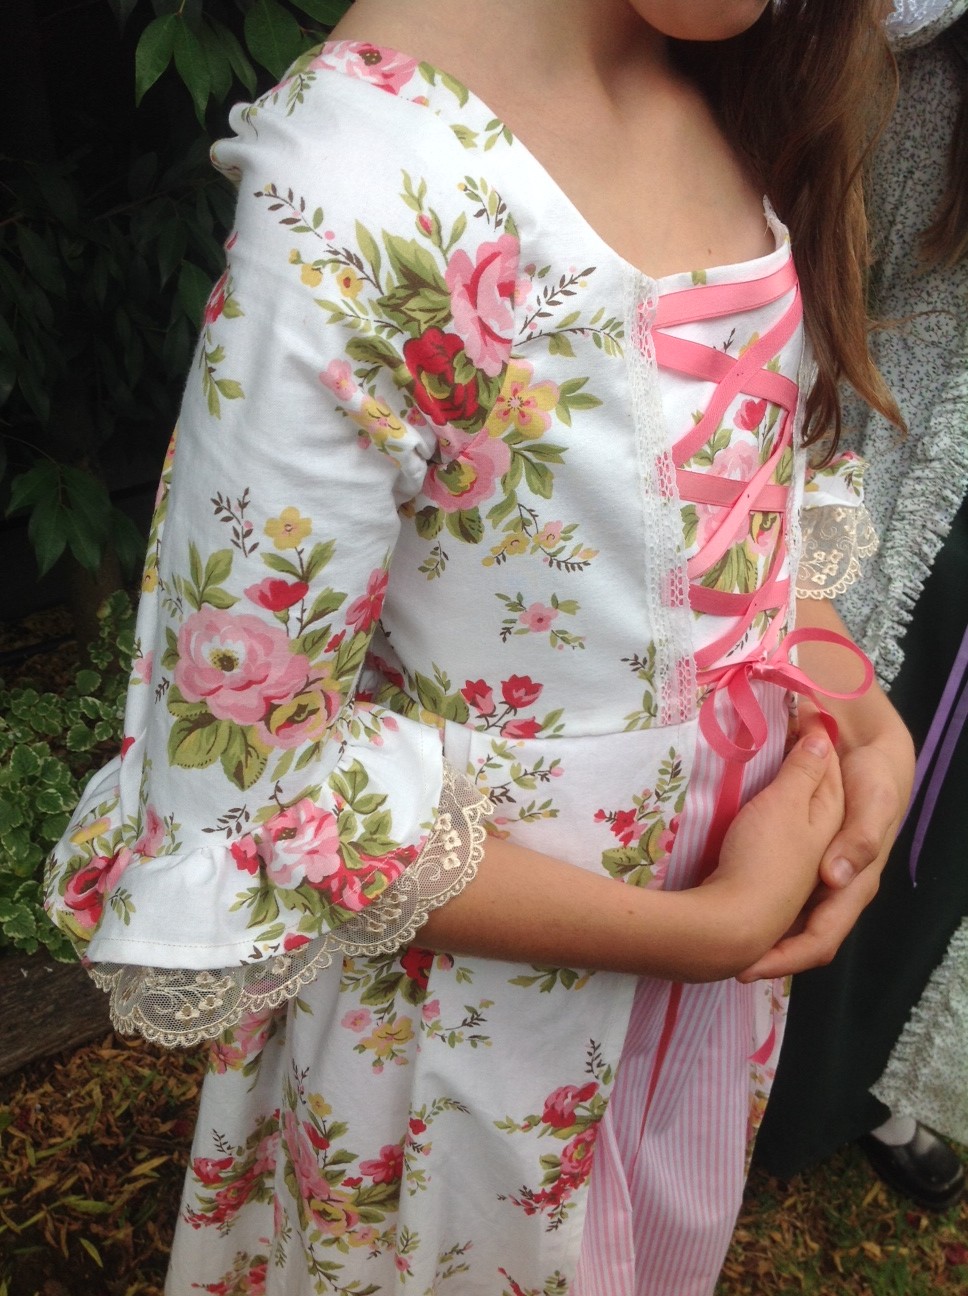
Sleeve detail
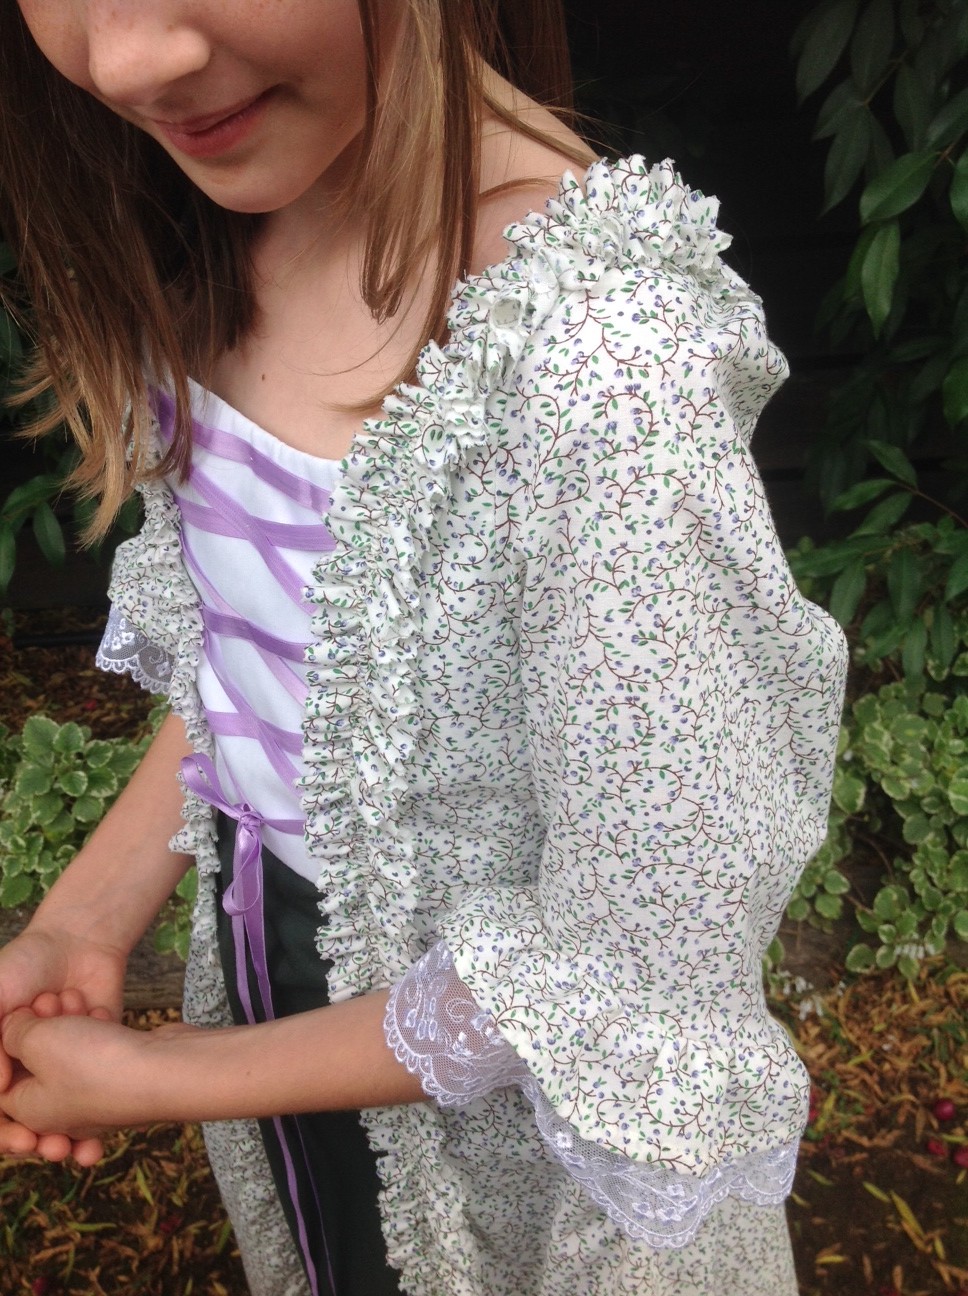
Trim detail
After my daughters wore the dresses to a birthday party, I got flooded with requests from other moms to make dresses for their girls -- expect the same when your child goes to play in her costume! This is a very, very popular look for girls, since it not only echoes Colonial American clothing but has a "fairy tale" look that just screams "princess" to feminine hearts. ;-)If you want to kick this project up a notch and go for an even more authentic look, you can make a separate full petticoat and a bum roll to help the skirt stand out a bit more.Happy sewing, and be sure to post a comment if you have any questions or suggestions!