How to Make a Drop-Front Bodice with the Regency Gown Pattern

Here is yet another modification you can make to my basic Regency Gown Pattern. This section will show you how the bodice can be changed to include a drop-front (or "apron front") panel. This is a fantastic feature for nursing moms, and I can tell you that I absolutely love nursing my daughter in this dress; it is so easy! But drop-front bodices aren't just for nursing moms. They are beautiful and authentic and fun to make when you want to do something different. I'm also going to show you how to make undersleeves that button in and out of the short sleeve's band -- which means you can go from Summer to Fall (or Winter) in a wink! I puzzled through this alteration scheme largely by "playing" in Janet Arnold's wonderful Patterns of Fashion I, which shows a drop-front gown, inside and out. I also had the privilege of studying an original drop-front gown in the D.A.R. Museum collection, which helped me get a handle on how these gowns worked. I wanted to be able to get the right look without having to create an entirely new pattern, though, so I ended up "melding" Arnold's sketches and my D.A.R. notes with my pattern to get the desired results. What I show below is a mostly period correct way to make a drop-front dress. Throughout these instructions, I will tell you what you can do if you want to make it totally period correct. Have fun!
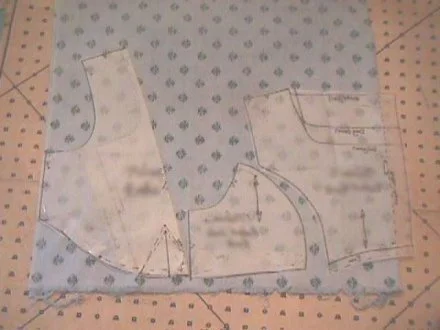
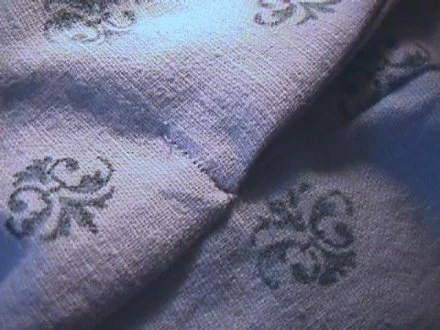
Pattern Layout: You are going to change the bodice front piece slightly in order to make it work with the drop-front panel. Instead of cutting it on the fold as usual, you will fold the center front of the pattern piece to form a "V" neckline. You can see how I've done this in the photograph. Don't change the shoulder section at all, but start your "V" where the neckline slopes down. (In the custom pattern pieces I created here, I also added about two inches to the bottom of the bodice front so that it wouldn't have an extremely high waistline.) You will then need to place the bodice back piece on the fold, since your bodice will not open in the back. However, you must lay the bodice back piece on the material so that one and a half inches of the center back hangs off the fold (eliminating the material originally needed for the back overlap). In the photo above, you can see the suggested pattern layout for all of the bodice pieces. Important Note: You will not cut your bodice out of your fashion fabric first! Instead, you'll use this layout and cut out a muslin toile (which you can then use for the bodice lining when you make the dress).
Go ahead and cut out your bodice lining now, and sew all of the pieces together (side back to back, shoulder seams and side seams). Now you are ready to try your lining on yourself or your mannequin. This step is very important, since you'll be able to check the fit and will be measuring to determine how to cut your drop-front panel.
Fitting the Lining:
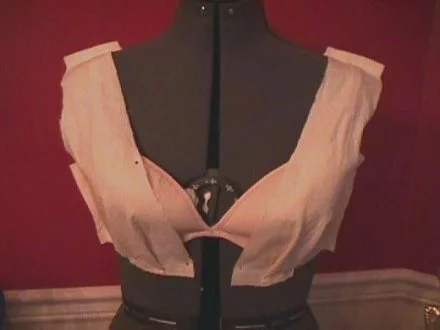
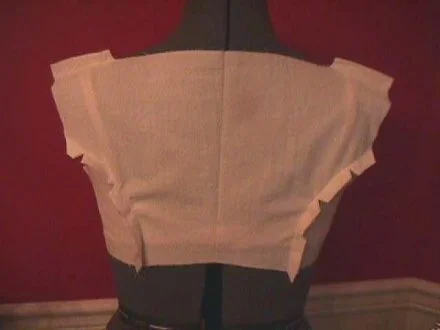
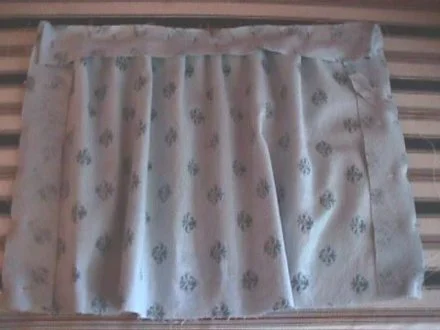
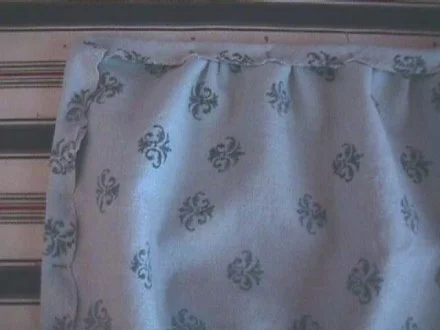
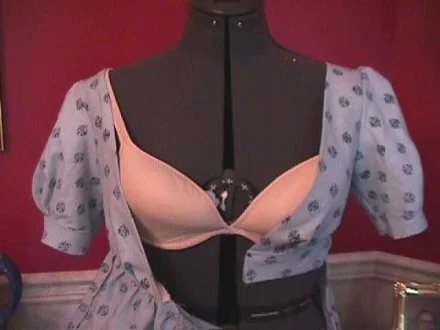
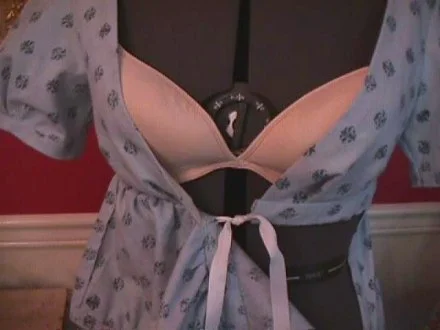
Here you see the lining tried on my mannequin. (The bra is on the mannequin because she is rather "flat" and needs the underwear in order to match my cup size. All "dial-up" mannequins like this are "A" cups, so if you are larger, it is best to put a bra on the mannequin and stuff the cups to achieve your shape and size.) You can see the I have "box pleated" the area under the bust, since this is the way the bodice will be sewn into the waistband. You could also gather this section, but pleats are easier to do and won't show anyway with the drop-front panel in place. When you check the fit on the mannequin (or on yourself), you just want to make sure that everything fits nicely in the armholes and that the bodice is long enough to come completely under your bustline with enough room for a 5/8" seam allowance. If you find you need to make any changes, just mark them and cut out a new lining. Once you have your final lining fitted properly, you can go ahead and cut out your bodice from your fashion material. Set that aside. Now it's time to measure for your drop-front panel.
Making the Panel:
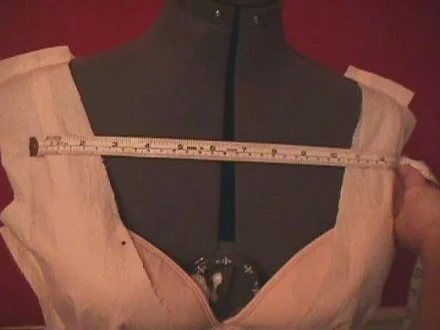
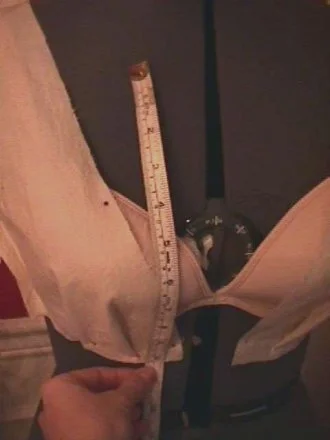
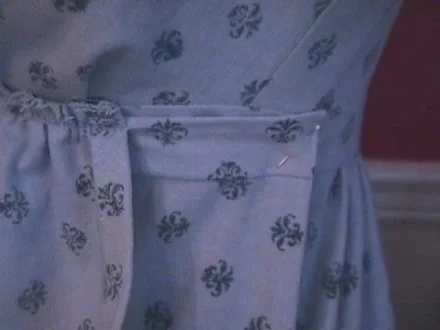
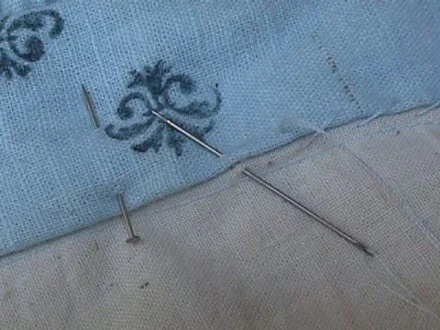
With your lining on yourself or on your mannequin, you can measure how wide and how deep you want the drop-front panel to be. The panel is gathered, so you will be adding to the measurements you take, but for now let's just get the basics out of the way. Decide where you want the panel to button onto the bodice below either shoulder. Stick a pin in that spot on one side of the bodice and "hang" your measuring tape on the pin. Now pull the measuring tape across the front of the bodice to the place on the other side where it will button. Write down this measurement (on my bodice, it was 12 inches). Before you remove the measuring tape, mark where it hits your body (or the mannequin) on the chest. You will be measuring down from this point now. "Hang" your measuring tape on this point, then drape the tape down over the bustline and mark where it hits the bottom of the bodice lining. On my bodice, this was 9 3/8".
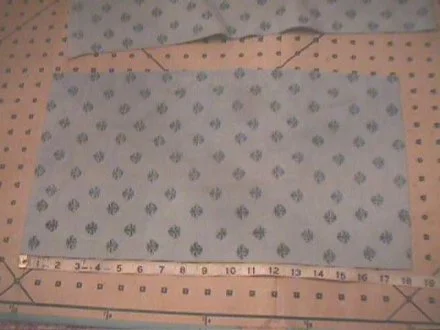
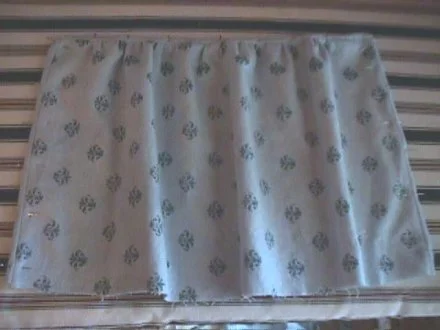
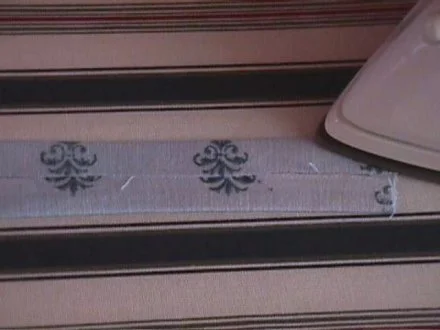
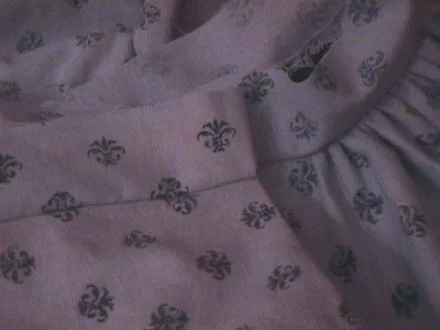
You can make your panel slightly gathered or very gathered, depending upon your tastes. You will need to have some gathering (at least three inches worth) in order to accommodate your bustline. I chose to add six inches to my width measurement, making my panel 18 inches wide. I then cut the panel 10 inches deep to allow for a 5/8" seam allowance to be taken into the binding at the top of the panel (remember that you will "lose" 5/8" at the top, so be sure to add that seam allowance, or your panel's neckline will be lower than you wanted it). In the photograph below, you can see my panel cut out of my fashion material.
Making the Bodice
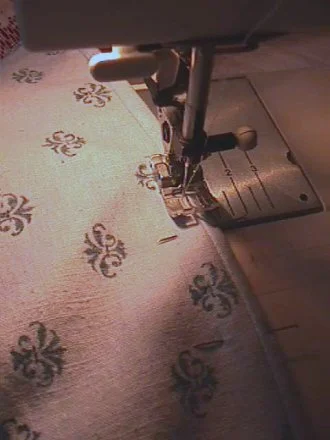
Go ahead and sew your bodice pieces together, just as you did the lining pieces. That accomplished, sew the lining to the bodice, using the regular gown pattern instructions. The only difference is that you'll be starting at one side of the bodice front "V" and continuing around the back and down the other side of the front. Once you've finished that, clip curves and grade the seam allowance as shown in the basic instructions. Turn the lining to the inside and understitch to keep the lining from "rolling" out:
When you understitch, you are simply sewing the lining to the seam allowance of the bodice as shown in my video below:
Constructing the Front Panel
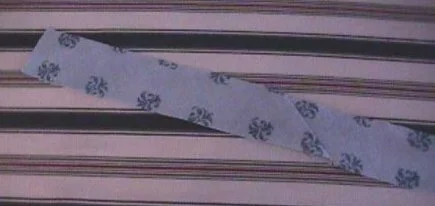
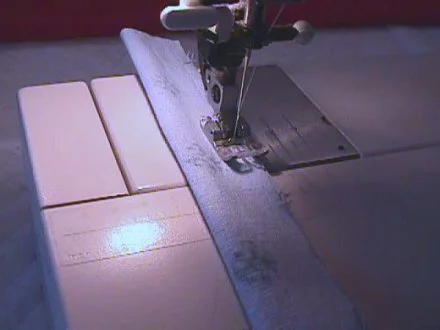
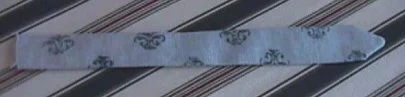
I finished the raw edges of my front panel by creating narrow bias binding out of the dress material. You can do this, or, if you prefer to have nothing show around the edges of your panel, you can line the panel. This will require you to cut out a lining that is exactly as wide as you want it, plus 1 1/4" (giving you a 5/8" seam allowance on either side). Then you can gather the fashion material panel and sew the lining to it. But in the photo illustrations here, you'll see how I bound the edges to give a look a bit like piping. First cut strips of fabric on a 45-degree angle and sew them together to form your binding (the binding should be wide enough for the 5/8" seam, plus enough to turn to the inside to cover the raw edge of the panel -- my binding was 1 1/2" wide). The finished binding strip needs to be long enough to go up one side of the panel, across the gathered top and down the opposite side. Taking my measurements from above, we see that I needed my binding to be 32" long. Below you see a strip of the binding:
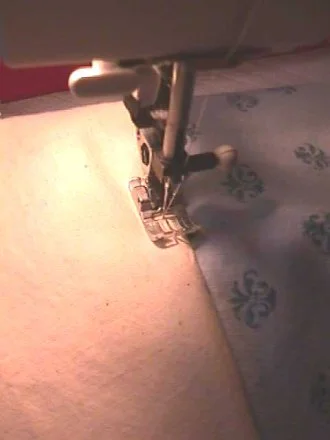
Now you are ready to gather the top edge of your front panel. Run two lines of gathering stitches along the top edge. Pull the stitches up until the panel is as wide as you want it to be (remembering to take into account the 1 1/4" you will "lose" when you bind the edges or line the panel). In my case, I pulled the gathers until the panel was 13 1/4" wide across the top:
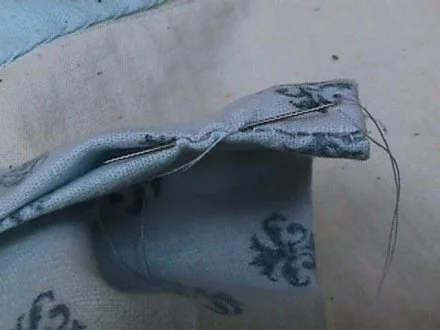
Starting at the bottom of one side edge, pin the binding up the side, across the top and down the other side, arranging the gathers nicely as you pin across the top. You will need to "miter" the corners of the binding to get them to lie down flat (see step #2 below). Stitch the binding to the panel, taking up a 5/8" seam all the way around. Clip the seam allowance and the corners (#3 & #4). Turn the binding to the inside of the panel and press, leaving a small amount of the binding showing on the outside (#5 -- this view shows the binding on the inside of the panel). Pin in place. Now "stitch in the ditch" on the outside of the gown to secure the binding on the reverse. (#6) If you want to be 100% authentic, do this step by hand. If you do it on the machine, you'll just have to take care to make sure you don't accidentally stitch over the panel or the binding. Now you have a nicely bound front panel (#7)! Run two lines of gathering stitches across the bottom of the panel, then set it aside.
#1
#2
#3
#4
#5
#6
#7
Sleeves
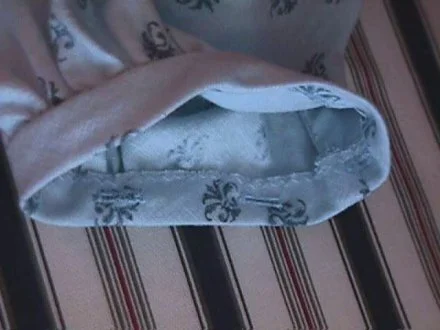
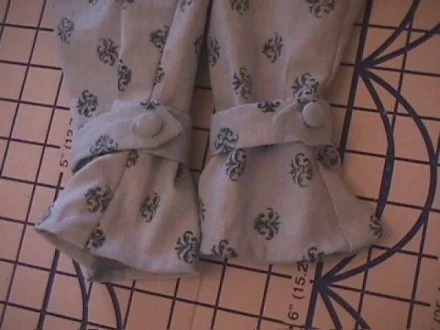
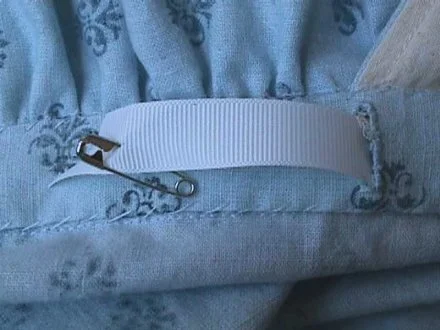
Go ahead now and make your sleeves (following the directions given in the regular pattern). I made my sleeves slightly longer, since I didn't want the very short puffed sleeves but wanted something more appropriate for a "work" dress. If you plan to make undersleeves, you can also follow the regular pattern instructions, but I'll give you a few extra photos and tips here for some special details. Before you whipstitch the bottom of your sleevebands over the seams inside your sleeves, you'll need to make buttonholes in the band (as I explain in the Online Photo Instructions). This will give you sleevebands that look like this on the inside:
Now, if you'd like to have the undersleeves fitted at the wrist, you can make a simple wristband that will go around the sleeve and button closed. Here are the steps for creating the wristband:
Measure around your wrist, determining how tight a fit you'd like to have. I recommend leaving at least an inch of extra room for comfort. Let's say your wrist is seven inches around. Add one inch for comfort, 5/8" to be sewn into the undersleeve seam and 3/8" for the wristband seam itself. That's a total of nine inches. Cut your wristband nine inches long and at least two inches wide (allowing for a 3/8" seam and enough room to turn the wristband right side out after sewing it).
Sew up the long edge of the wristband.
Stitching up the long edge of the wristband
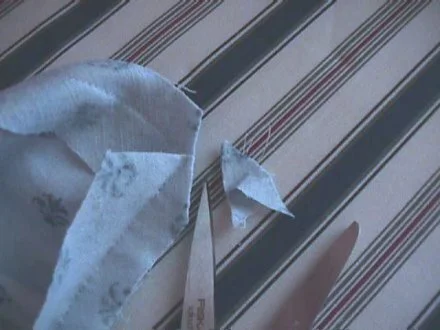
3. Placing the seam in the center, stitch a point at one end of the wristband. Clip off material on either side of the point so your wristband looks like the one in the second photo below

4. Turn wristband right side out and press:
Finished wristband
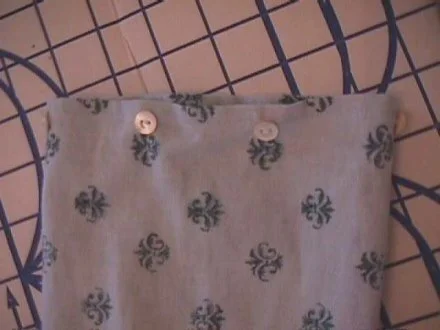
Continue through the rest of the Online Photo Instructions to insert the wristbands in the undersleeves and add buttons to the top edges of the undersleeves. The final result will look like this:
Adding the Skirt and Waistband
Now you can cut out your skirt a pieces, remembering that the length will depend on how wide a waistband you plan to add (see below). You will cut the skirt front and the skirt back on the fold, since the dress does not open down the back. Go ahead and sew the skirt side seams together, leaving six to eight inches open at the top of the left hip side seam, as shown below:

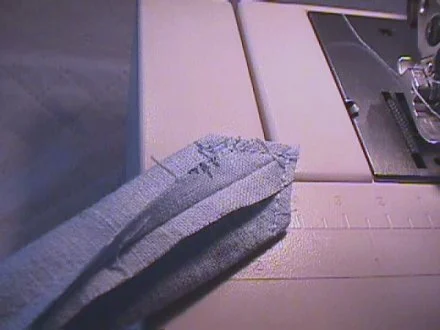
Run two lines of gathering stitches across the top of the skirt back (you can have it gather all the way across or just in the center; alternatively, you can pleat the fullness when you add the waistband). Now follow the directions in the regular pattern instructions to insert a placket in this open side seam. (The skirt front edge of the placket will overlap the back.) Once you have the placket in place and neatly pressed, topstitch across the bottom of the closed placket to reinforce it (you can do this by hand if you are making an authentic dress). Below is a close-up shot of the reinforcement:
Time to cut out the gown's waistband. The waistband is very necessary for this dress, because it contains a drawstring (or ribbon) that closes the dress up when you wear it. You can make it wide (mine is one inch wide finished) or narrow (allowing only enough room for a thin drawstring). The width of the band is totally up to you. To figure out the length, measure around your ribcage where the bodice hits you (mine hits about two inches below the bustline), keeping a finger between the tape and your body to allow for a bit of ease. Write down that measurement. Now measure from your bodice side seam (while you are wearing it) to the center front of your torso, and write that measurement down. Add the two measurements together, and that is how long the waistband needs to be. For example, if your ribcage measurement is 34" and your side-to-front measurement is 9", your waistband will need to be 43" long. (Obviously, if you plan to wear any special undergarments, like stays, you'll need to measure over those.) Cut out one waistband out of your fashion material and one waistband lining out of the same or out of muslin (mine was out of the fashion material, since I had enough left over).Now, attaching the waistband is going to seem a bit tricky at first blush, but it won't be once you start pinning it in place. First, turn under 5/8" of each end of the waistband and press. Now measure from one folded edge of the waistband to the point on the band that matches your ribcage measurement, and mark this spot with a pin. In other words, if your ribcage measurement is 34", you will place a pin at the 34" mark.
Line up one folded under end of the waistband with the front edge of the skirt placket, right sides together. Pin waistband to top of skirt front edge all the way to the opposite side seam. Now find your pin mark on the waistband and match it to the other skirt side seam (not to the underlapping edge of the placket). Pin at that spot. Now you can gather (or pleat) all of the skirt back fabric to fit the waistband at the back. Match center back of waistband with center back of skirt, then distribute the skirt material evenly and pin. Stitch waistband to skirt all the way around. You'll see, of course, that there is an "extra" bit of waistband hanging free at the left skirt side seam. That is absolutely correct, as you see below (#1). The skirt front is going to overlap and cover this extra waistband (#2) -- but we'll get to that in a bit!

#1
#2
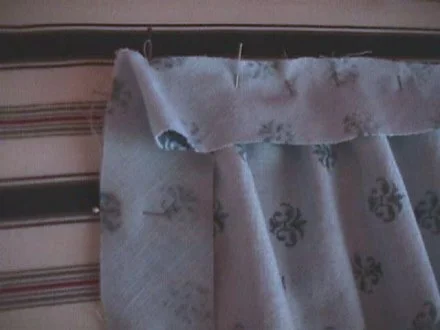
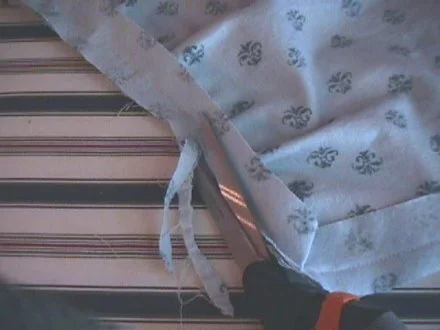
You are ready now to attach the bodice to the waistband. At this point, you need to try the bodice on yourself or your mannequin and pin the "box pleats" I showed you above. Pin them so that they give the necessary amount of room in the bust and are comfortable (don't worry about how they look; they will not show on the final gown). Now baste across these pleats to hold them. This next step is going to be much easier to do on a mannequin than on yourself, but if you don't have a mannequin, have a friend help you out. With the bodice on and correctly pleated, take the front panel and pin it where you want it to button to the front (just below each shoulder) on either side. (You measured for this before you cut out the panel.) With the top pinned on either side, drape the panel so that it properly covers the bodice front opening (I made my panel so that it attached 1/2" in front of the bodice side seams on either side). Pin the bottom of the panel to the bottom of the bodice front on your right-hand side. Mark where the panel will pin on the left side (you're going to need to leave this unpinned in order get out of the bodice). Pull up the gathering stitches along the bottom of the panel and distribute the gathers evenly (and comfortably) across the front. Tie off the gathering threads when you have the gathers where you want them. Take off the bodice, then pin the panel to the left side according to the markings you just made. Now turn the bodice wrong side out so you can see exactly where the panel hits. You will probably find that you need to trim off some of the bottom of the panel to make it fit correctly, as shown below. (This is why draping the panel on yourself is so important; if you skip this step, your panel is going to bunch awkwardly or fit too tightly across the bust. Confession time: I made this dress while I was expecting baby #4 and could never try it on, because I was too big. I made the gown entirely on my mannequin and had to alter the bodice panel after the baby arrived, since it did not accommodate my bustline post-baby!)
Once you have the panel properly trimmed, go ahead and baste the panel to the bottom edge of the right side of the bodice front (your right side). You'll be basting the wrong side of the panel to the right side of the bodice, and you'll have about half of the panel "left over" after pinning the right side to the bodice. Just leave this free for now.Time to attach the skirt! The side seams of the skirt are not going to match the side seams of the bodice because of the changes you made to the front of the bodice. The best way to begin matching the skirt to the bodice is by lining up the center back of the waistband with the center back of the bodice. Now continue pinning from this central point out, going around each side of the skirt/bodice and pinning until the bodice is attached all the way around. The drop-front panel will be sandwiched between the bodice front and the waistband on the right side, then will be pinned by itself to the waistband beyond. The left side of the bodice will pin onto the waistband extension (the "extra" you had left over when you attached the skirt to the waistband). Stitch. To make sure everything worked out correctly, you can try the bodice and skirt on your mannequin or yourself (#1) and pin the skirt placket closed at the left side seam, as shown below (#2):
#1
#2
If everything is fitting correctly and comfortably, you are ready to line the waistband and run the bodice drawstring. Iron under 5/8" of each end of the waistband lining, then iron under 5/8" along the top and bottom. Now pin this lining over the waistband, matching the ends.
Don't stitch yet!
Mark where the waistband lining meets the right bodice front (your right side). Now unpin the lining so that you can make an eyelet here for your drawstring. I used 7/8" wide grosgrain ribbon for my "drawstring," so I made a 7/8" buttonhole for the ribbon to pass through. Just make your eyelet the proper size for your drawstring. Once that is finished, pin the waistband in place again. Where the waistband lies next to the bodice (or skirt) of the dress, you can whipstitch it in place, like this (remember that in these photos, my waistband lining is of fashion material):
Don't close up the inside end of the waistband! This is where your ribbon/drawstring goes. On the outside waistband extension (that overlaps the placket), you will need to slipstitch the edges and end closed so no stitches show, as shown here:
Now cut your drawstring/ribbon long enough to tie in the front (so add about 12 inches to your ribcage measurement from above). Put a safety pin in the end of your drawstring/ribbon, then feed it through the open end of the waistband extension inside the bodice (#1). Feed the drawstring all the way through the waistband and out the eyelet you made in the lining (#2):
#1
#2
Ta-da! Now you can put your dress on for a final try-on before you hem it and add the front panel buttons and side placket hook and bar! Here is how the drawstring works:
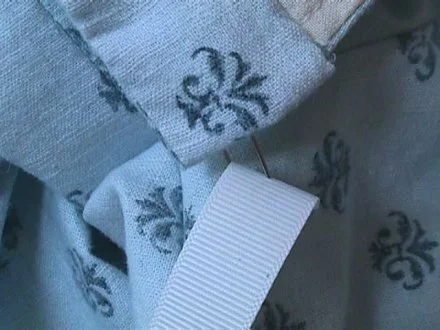
Tie the ribbon/drawstring snugly around your ribcage. The skirt will fasten closed at the left placket with a sturdy skirt hook and bar (or a button, if you prefer). The panel fastens closed with buttons at either corner. All you need to do is make small buttonholes in the panel, then sew the buttons to the bodice where you marked their placement earlier. I chose to make fabric-covered buttons for my dress, and I used a heavy skirt hook and bar combo at the left placket (along with a snap in the center of the placket to keep it from gapping). For a period-correct closure, you can add a button to the placket or use a hook with thread "bar." Snaps are a no-no, so just use hooks and thread bars in the placket itself to keep it from gapping. Now, the period correct dress at the D.A.R. closed a wee bit differently. Instead of having the drawstring tie inside the dress (where it would be hidden from sight), the eyelet in the waistband lining is ommitted, and the drawstring comes out the end of the waistband. Then the inside end of the drawstring exits through an eyelet hole under the right arm (the eyelet goes through the waistband and the waistband lining). The drawstring ends are then pulled around the back of the dress and tied like an apron. Apparently, the wearer didn't mind the drawstrings dangling free, though I'd recommend using pretty ribbon rather than string. On the Janet Arnold dress, the drawstrings run around the outside, then pass back inside the dress through two tiny eyelets in the back, where they are tied under the skirt and kept out of sight (my description is far less effective than Arnold's sketches, so get a copy of the book to see for yourself!). Once you have the closure working properly, you can hem the dress, and you'll have a new creation ready to wear!
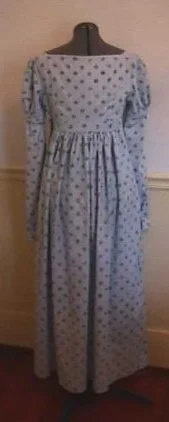
The Finished Creation
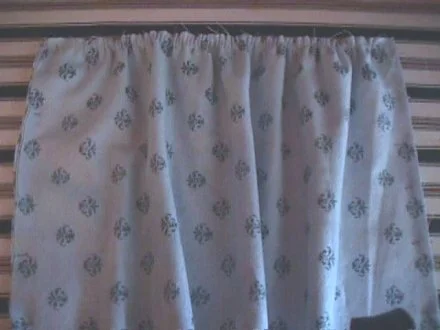
Here you see the final dress with and without undersleeves. The fantastic reproduction print fabric was hand block-printed by the folks at White Fox Trading Company, which is, unfortunately, now out of business.
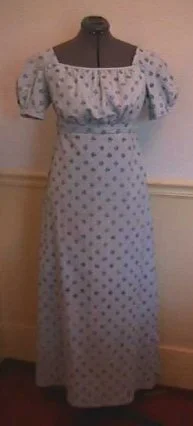
Full-length view without undersleeves.

Back of dress sans undersleeves.
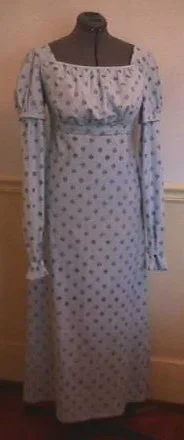
Full-length view with undersleeves.
Back of dress with undersleeves.
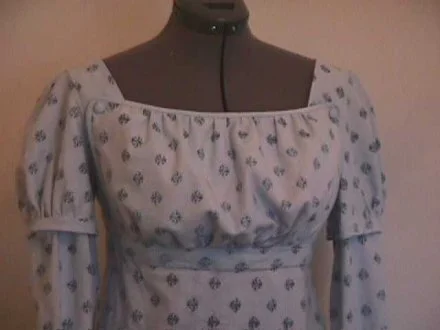
Bodice close-up.
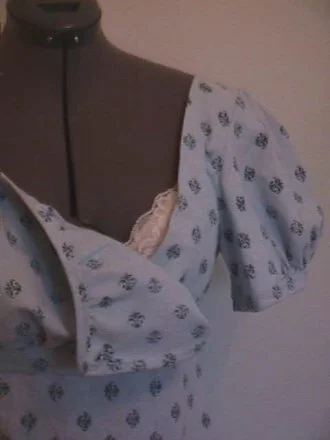
One corner unbuttoned.
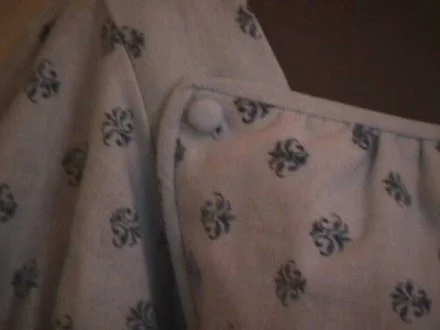
Close-up of covered button.


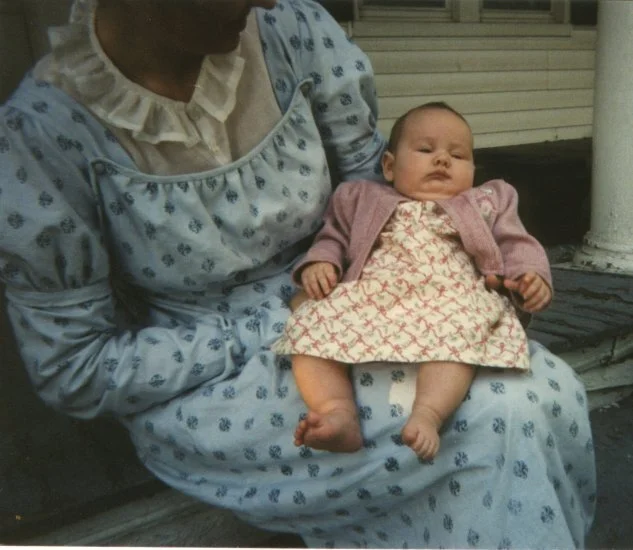
At the top of the page you saw me wearing this dress with a period correct chemisette. In these photos I am wearing it over a short-sleeved Oxford shirt in pima cotton. The shirt is fitted and lightweight and so goes under the dress without adding bulk. It is comfortable and a great alternative if you don't have a chemisette and would like one. To boot, the collared look is right out of the Regency period. I have seen extant chemisettes with pointed collars, and there is a beautiful portrait of a lady by Gilbert Stuart in the National Gallery of art which shows a woman wearing a chemisette that looks just like this shirt!
BONUS!
Instructions for Making a Ruffled Chemisette
If you'd like to create a Regency chemisette to wear beneath your gown, you can do it easily without a pattern. (I do have a pattern if you prefer that!)
Cut a square of fabric the width of your shoulder-to-shoulder measurement plus enough to turn under for a hem at each side (about one inch). The length is up to you, but I just cut an exact square.
Fold that square in half and use it as your pattern piece to cut out the front pieces, adding two inches so that you have enough to turn under where the button holes and buttons go.
Lay the fronts over the back square, matching the side edges and top edges. Fold carefully in half down the center vertically, then use a neckline curve (or another pattern with a small neckline as a guide) to cut out a neckline.
Sew the chemisette together at the shoulders.
Hem the side edges (at the shoulder).
Hem the front edges, then turn them under and iron them in place (for a half-inch overlap).
Cut a long, narrow piece of material to use as a ruffle (generally cut it twice as long as the neckline measurement is around).
Hem the bottom edge and each end of the ruffle.
Run gathering stitches across the top and pin the ruffle to the neckline edge (wrong side of ruffle to right side of neckline). Sew in place.
Make self bias binding out of your material and bind the neckline edge, enclosing the ruffle seam completely.
Place buttons and buttonholes, and you're finished! :-)
Note: The fabric I used was light organdy, but voile will also work. Pima cotton is great if you don't want an opaque chemisette.